
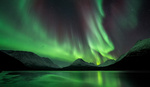
Ah, the crown of the (Ant)arctic. Known in the northern hemisphere as the Aurora Borealis (northern lights), and as the Aurora Australis in the southern hemisphere, these brightly colored bands of moving and waving light are a majestic display in the night sky. Who doesn't want to take a picture of this otherworldly phenomenon? Here's exactly how to do it.
The Visibility
The sun shoots out a constant stream of charged particles which we call the solar wind. When that stream interacts with the Earth’s magnetic field, these particles are led to the poles through the toroidal (donut-like) shape of the field. It’s at our poles where stream gets concentrated and crashes into particles in the Earth’s upper atmosphere. This high energy reaction emits light in varying visible colors, which we perceive as the northern- or southern lights.
https://500px.com/photo/196529185/at-winter-s-gate-by-daniel-laan
Sometimes that solar wind stream is stronger and denser than most often is the case. On occasion it can be so strong that our magnetic field jitters and moves erratically, therefore twisting and bending the aurora in seemingly impossible shapes. But there’s one solar phenomenon that trumps all. The coronal mass ejection. Solar flares can trigger enormous explosions where large chunks of the sun’s mass get flung into space. When those are Earth directed, it’s matter for concern. When they’re strong enough, the charged solar particles can destroy electronic circuitry, so naturally we need some kind of warning to protect our modern world.
1. Your Location
In rare instances, the aurora has been seen as far south as Cuba. But that isn’t the norm. You’re far more likely to capture the lights under pristine skies near the Arctic Circle. There’s almost always some green in those skies, given the fact that it’s clear and as long as you extend your shutter speed enough.


2. Kp-index
If there’s one thing to learn about forecasting the aurora, it’s the use of the planetary K-index (KP-index). It’s used to characterize the magnitude of geomagnetic storms. Kp is an excellent indicator of disturbances in the Earth's magnetic field and therefore, potential displays of aurora.
 The scale goes up from 0 to 9. Where 5 or more indicates a geomagnetic storm. The further up this goes, the farther south the northern lights may be visible.
3. Color
It’s interesting to note that more temperate regions see more colorful displays of the aurora. It’s often misunderstood that the northern lights are green. Magenta, blue, and even deep red can be seen and photographed on nights where the aurora is most active. Each gas (oxygen, nitrogen molecules, and atoms) emits a particular color depending on the energy of the precipitating particles, and atmospheric composition varies with altitude.
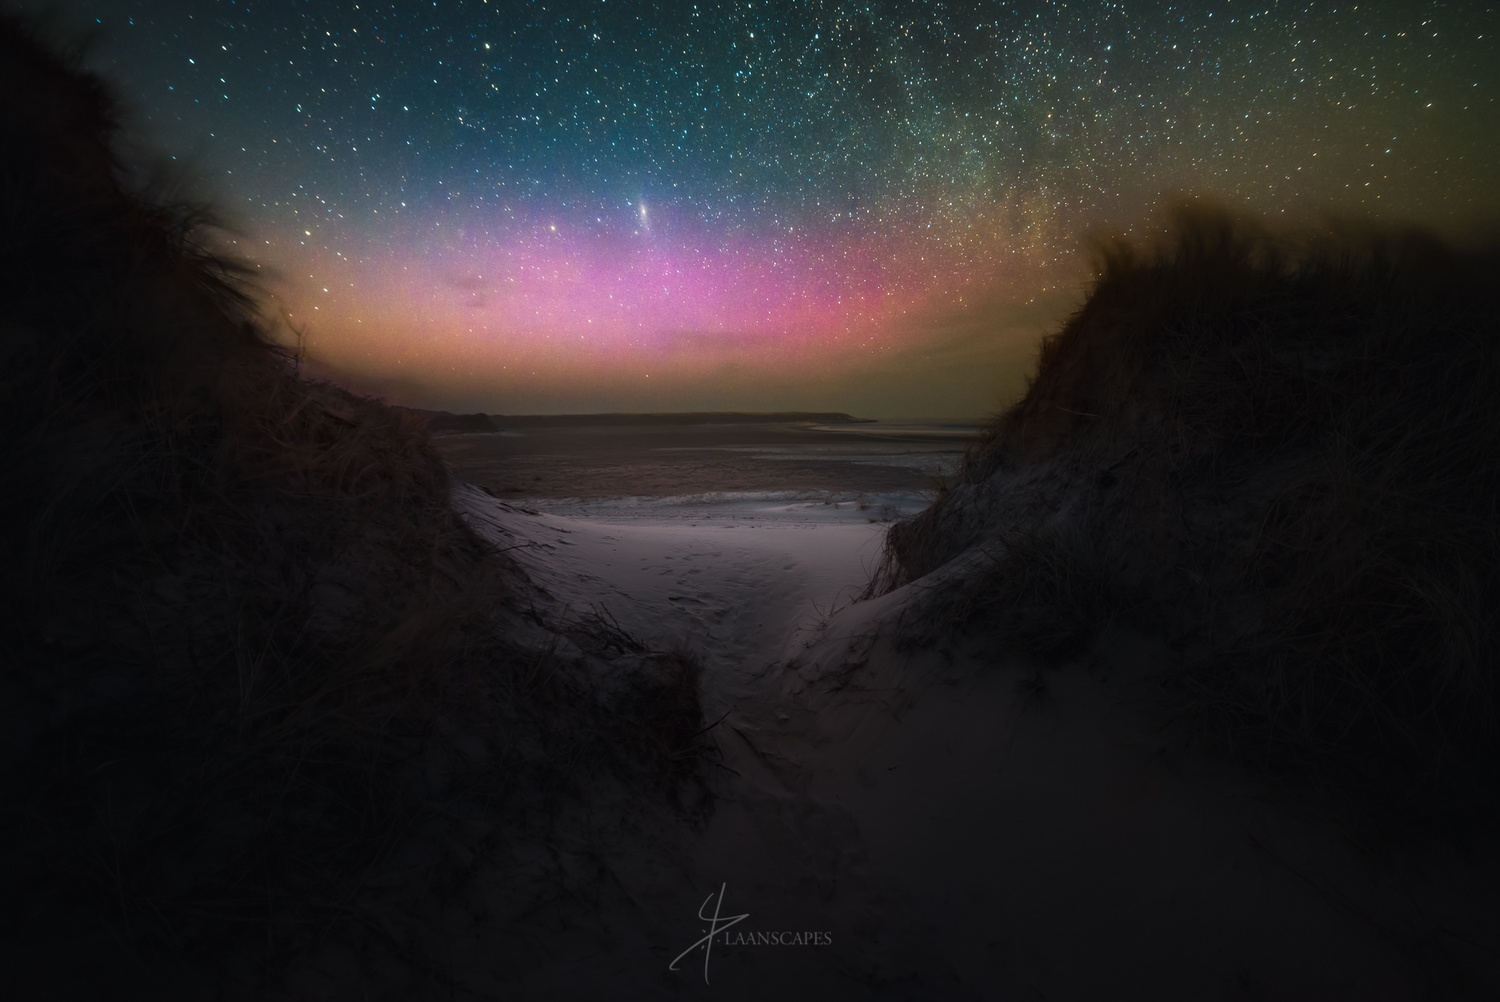
The Andromeda galaxy punching through a magenta aurora during a geomagnetic storm. Texel, the Netherlands.

This magenta aurora was captured near my home in the Netherlands. No arctic conditions here.
3. Bz
The earlier mentioned Kp-index is derived from the maximum fluctuations of horizontal components observed on a magnetometer during a three-hour interval. In short, it says something about the past three measured hours. That makes it hard to say anything about how it will look an hour into the future. That’s why a couple more advanced measurements should be mentioned before we get into photographing the aurora. Remember this: When the Bz is southward, geomagnetic disturbances become much more severe than when the Bz is northward. In fact, I don’t even go out when the Bz is northward. However, this polarity can change at a moment’s notice. And when it does, you have about 45 minutes to get to the location where you want to photograph the lights.
 The direction of the interplanetary magnetic field (Bz) is a measure of the North/South orientation of the interplanetary magnetic field, measured perpendicular to the ecliptic plane.
4. Solar Wind Speed
Faster speeds means more interaction with the magnetic field: So stronger aurorae. Normally, that speed is around 375km/s. When the speed picks up to double that amount, it’s reason to dress warm for the night. Especially if you’re located in the Northern States, South Australia, Northern England, or anywhere along those lines. With speeds of around 500km/s, the aurora might photobomb you when pointed towards the poles if you’re anywhere in Scotland, Scandinavia, Canada, or New Zealand.

Camera Settings
Milky Way photography is rather easy to get into, but quite difficult to master. That’s because the settings on your camera are almost always identical. That’s certainly not the case for the northern lights. The dynamic nature of the aurora has you constantly adjusting your settings in order to control the exposure. The steep learning curve of aurora photography starts at setting your camera’s ISO, aperture, and shutter speed in the complete dark.
https://500px.com/photo/192075017/divine-skies-by-daniel-laan
Especially during a geomagnetic storm when the auroral display warps violently across the heavens, you don’t have time to turn on your headlamp, adjust settings and shoot again. And it’s too dark for the auto-exposure to have effect anyway. So here’s a quick guide to help you prepare:
1. Tripod
It goes without saying that a tripod is mandatory. Due to the longer exposures, you don’t want the movement of the aurora to be influenced by the shake of your hands.
2. Focal Length
Make it as wide as possible. Think about 14-20 mm or even a diagonal fisheye on a full frame camera. That way you can image the largest structures of the aurora, linking the sky together.
3. Aperture
Again, go as wide as possible. This is because we’re looking to capture detail in the shape of the aurora, so priority goes to shutter speed and lowering the ISO. f/4 at the minimum.
4. Focus
Because we’ve set the aperture to a wide setting, it’s imperative to set the focus to manual and focus right before the infinity mark. That way you can have some reasonably sharp outlines of distant objects in your frame, which add to your composition. Oh, and turn off any stabilization you might have on your lens or body while you’re at it. That is counterproductive when you photograph from a tripod.
5. ISO
Here’s where it gets interesting. On Sony and Fuji sensors, you’re best off with dialing in 400-800 and never look back, because of the ISO-invariant circuitry. But that means you’re not going to get a well exposed preview when you take a look at your result on the camera’s LCD. Canon users: Go as low as possible, without you having to increase the exposure in post.
The best advice I could give you on any camera as a beginner, is to start at ISO 3200 and adjust it from there. Some cameras can produce clean looking results at 12800 or even higher, so it’s best to experiment a bit with this until you are happy with your result.
6. Shutter Speed
The single most important thing to control during an auroral display, is the length of the exposure. Your goal is to find the equilibrium between structure (shorter exposures) and brightness (longer exposures). In as far south as the Netherlands, I’ve been happy with 10 second exposures, but in Iceland, that would have completely blown out any highlights. The lowest I got there was at 1.6 seconds. Personally, I always start short at 2 seconds. That way I only have to wait two seconds to shoot the next one. If you would have to wait 25 seconds to conclude your image is blown out, you might miss that one shot where the composition was just perfect.
https://500px.com/photo/206809987/green-maw-by-daniel-laan
Next Time: Processing the Aurora
With a memory card full of memorable shots, it’s time to tweak those sliders to get the most out of the northern lights. Next time, I will show you exactly how to process on of your images in Lightroom.
[via NOAA Space Weather Prediction Centre; Spaceweatherlive.com]


I was lucky enough to see a Kp6+ and a Kp5+ last year on the Lofoten Islands. Unforgettable
By the way, at the time they were classified respectively Kp7 and Kp5, probably they adjusted the values
https://www.spaceweatherlive.com/en/archive
Sometimes they do that. It's because the Kp is an average value over the last three hours, so it has to be adjusted in order to represent the actual planetary K-index at the time.
EDIT: Take a look at the Wing Kp-index along with the planetary K-index.
"The Wing Kp model uses solar wind data to produce both a 1-hour and a 4-hour advance prediction of the level of geomagnetic activity, as represented by the planetary K-index, every 15 minutes."
-http://www.swpc.noaa.gov/products/wing-kp
Great info here. Thanks
Cheers!
Great info, I love shooting aurora it is a tricky but exciting subject. Something I have added to my tools for shooting aurora is a variety of weather apps and weather radars It's one thing to have the magnetic storm but your next biggest challenge is finding open sky. Another great tool is Facebook, there are numerous Facebook pages dedicated to aurora photography, my favourite is the Alberta Aurora Chasers group. Not only is it great for inspiration, the people who run it are crazy informed and on nights that storms are peaking everyone checks in with what they see and where. This way you can use it as a weather map, where to go and where to avoid.
Thanks for the kind words. Yeah, it's truly a tricky subject. Especially when it get complicated by using foreground subject matter that's near the minimum focus distance of the lens. There are guys on 500px (you can't miss them with 50k followers who are adept at this.
Love the fact that you've included some additional resources.
I use the aurora alerts from Spaceweatherlive and have an Android app simply called "Aurora", which uses push notifications. Guys, keep these coming! :)
I took these ones while drunk in Iceland at the Blue Lagoon. Single, 30 second exposures on a 5dmk2. I think...
Haha! Love the story. :D Must have been a sight. That blazing cloud though! Not exactly a warm summer's breeze I presume? :)
It was in August, but it definitely wasn't warm haha. I used a small led flashlight I had in my camera bag to light the foreground, but it was sort of just a fumbling about guessing game. This is the first, and only time I've seen Aurora in person.
I've added photographing the aurora to my photography bucket list after I checked off a 30 year old bucket list item in July 2011.
It looks like I can use Portra 400 or 800. I may have to find a used Canon FD 17mm, 20mm, or 24mm lens; I have the Canon FD 28mm f2.8. Besides my Canon A-1 and New F-1, I also own a Canon DSLR.
Excellent article. Verifies some things i found by trial and error, and some new that will definitely help in future! Attached shot in Manitoba last August. Three nights in a row. This one of favorites. D7100/ 17-35 2.8 D/ F4 at 10 sec. (?)
Love the shape and sheer mass of those lights! Must have been a great display! Cheers!
Part 2 is up, guys! https://fstoppers.com/originals/advanced-six-step-program-processing-aur...