How to Use a Projector as a Lighting Tool for Creative Portraits
In my opinion, there’s an extra layer of believability — a tangibility, if you will — to using practical effects as opposed to relying heavily on post-production. Post work is limited by the breadth (or lack thereof) of imagination, which is why I try to get as much as I can in-camera.
The only projector I had access to was old, dim, and would stop working every time it was bumped. Despite all the elements working against me, I pulled off an image that I was happy with:
Because the projector was so dim and since I needed the projector to be far enough away from the background that the image filled my frame, I had to completely darken the room that I was shooting in, in order to keep the room light from diluting the projection.
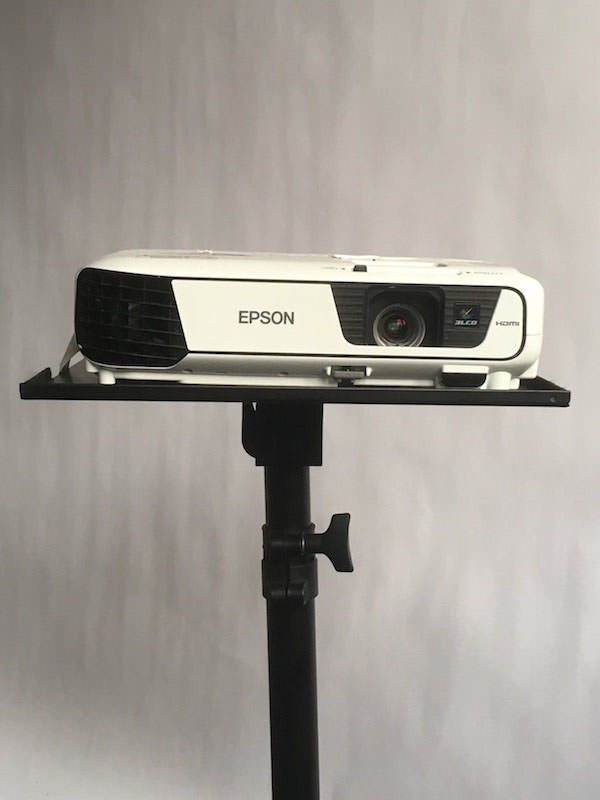
All that is to say when it comes to selecting a projector to use in a shoot, go for the brightest one you can find. Fast forward three years and I have since purchased a projector of my very own: an Epson EX3240. It was basically the brightest, highest rated projector that I could find (3200 lumens) without spending a fortune (less than $400).

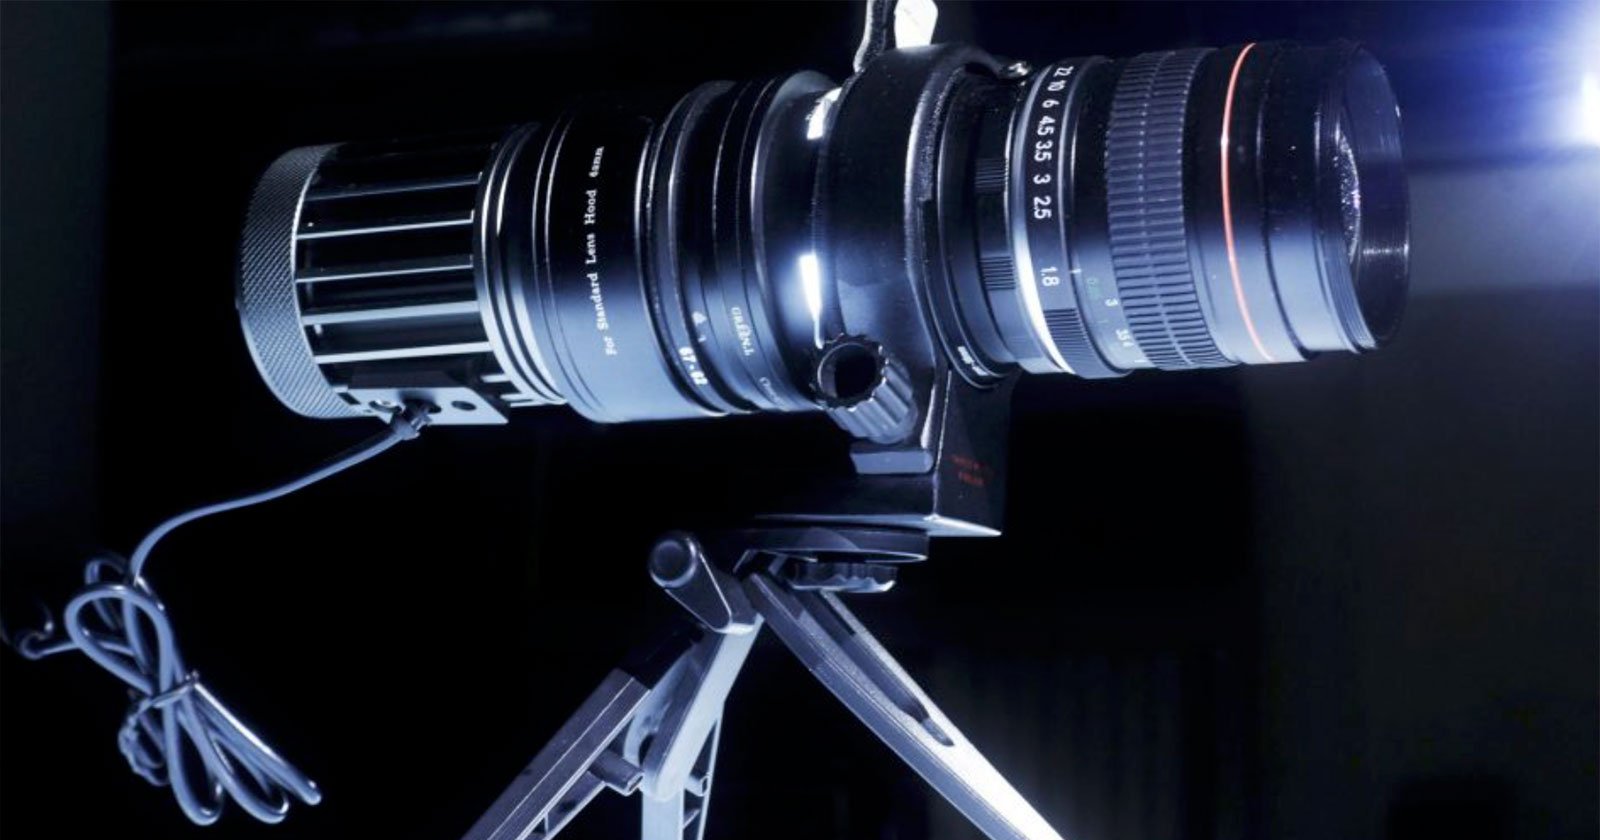
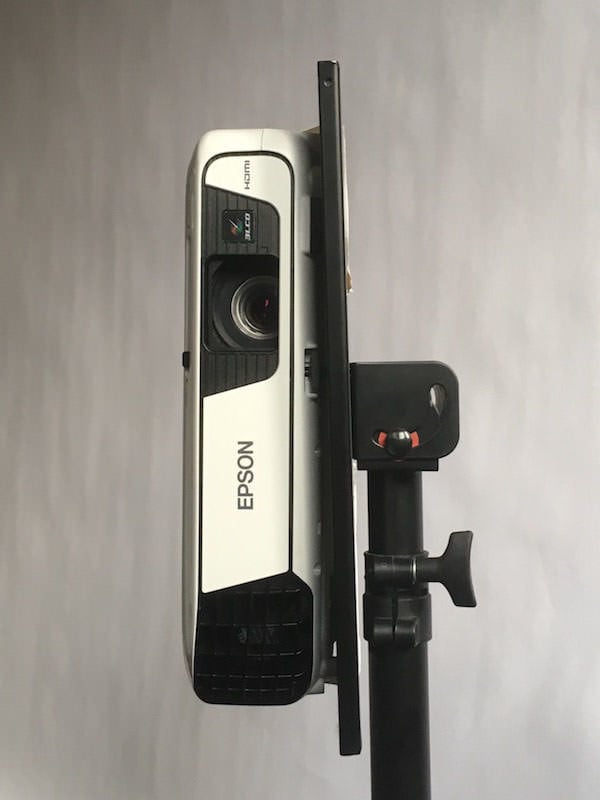
The problem with using a projector as a light source is that it’s tough to get it into desirable positions. Projectors are designed to be stationary, and all mounting systems that I have found for them are designed accordingly. Ideally, I would have it mounted onto a ball-head so I can position it at any angle. The best solution that I have found to date is a laptop stand. The stand rotates on a single axis point to a 90-degree angle, allowing horizontal and vertical positions. I literally just use duct tape to attach the projector to the stand.
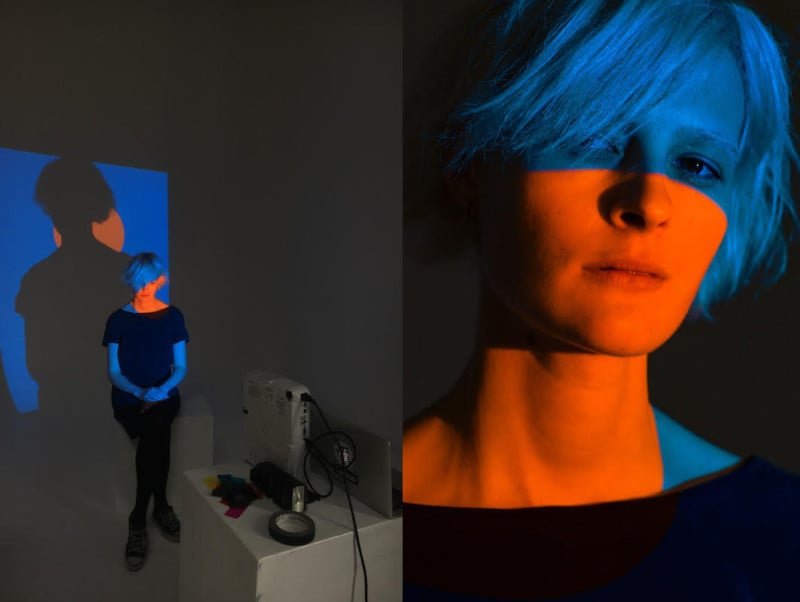
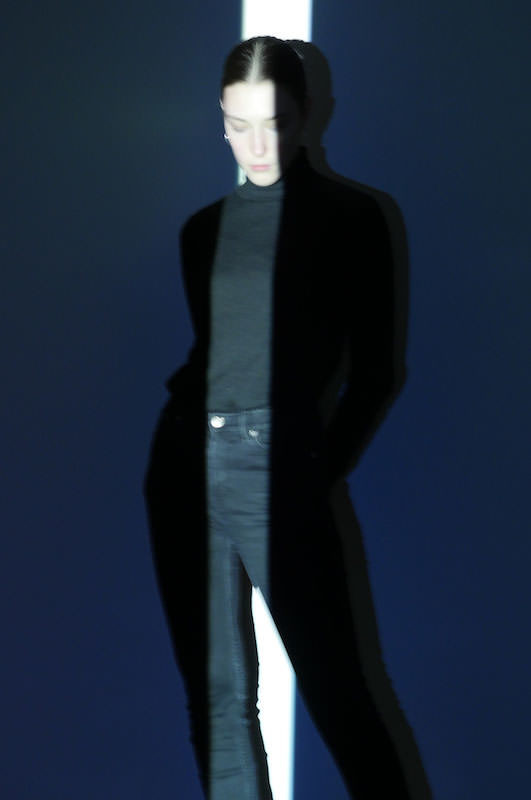
There are a number of ways to use projectors in a shoot. You can aim it behind the model, you can aim it onto both the model and background or you can position it in a manner that it falls on the subject but not the background. Once you determine where you will aim your projector and you begin calculating your exposure, make sure to keep track of what the ambient light in the room is doing. Below, you can see how the tungsten light in the next room affected the ambient exposure.

Next, you need to check the resolution settings on the projector. Below, you can see that the projected image on the left is rendering poorly, resulting in pixelated shapes. One workaround can be shifting the projector lens slightly out of focus. Another is lowering the sharpness in the menu settings of the projector. Side note: I’ve found that if the projector is closer to the subject, there’s little to no pixelation.

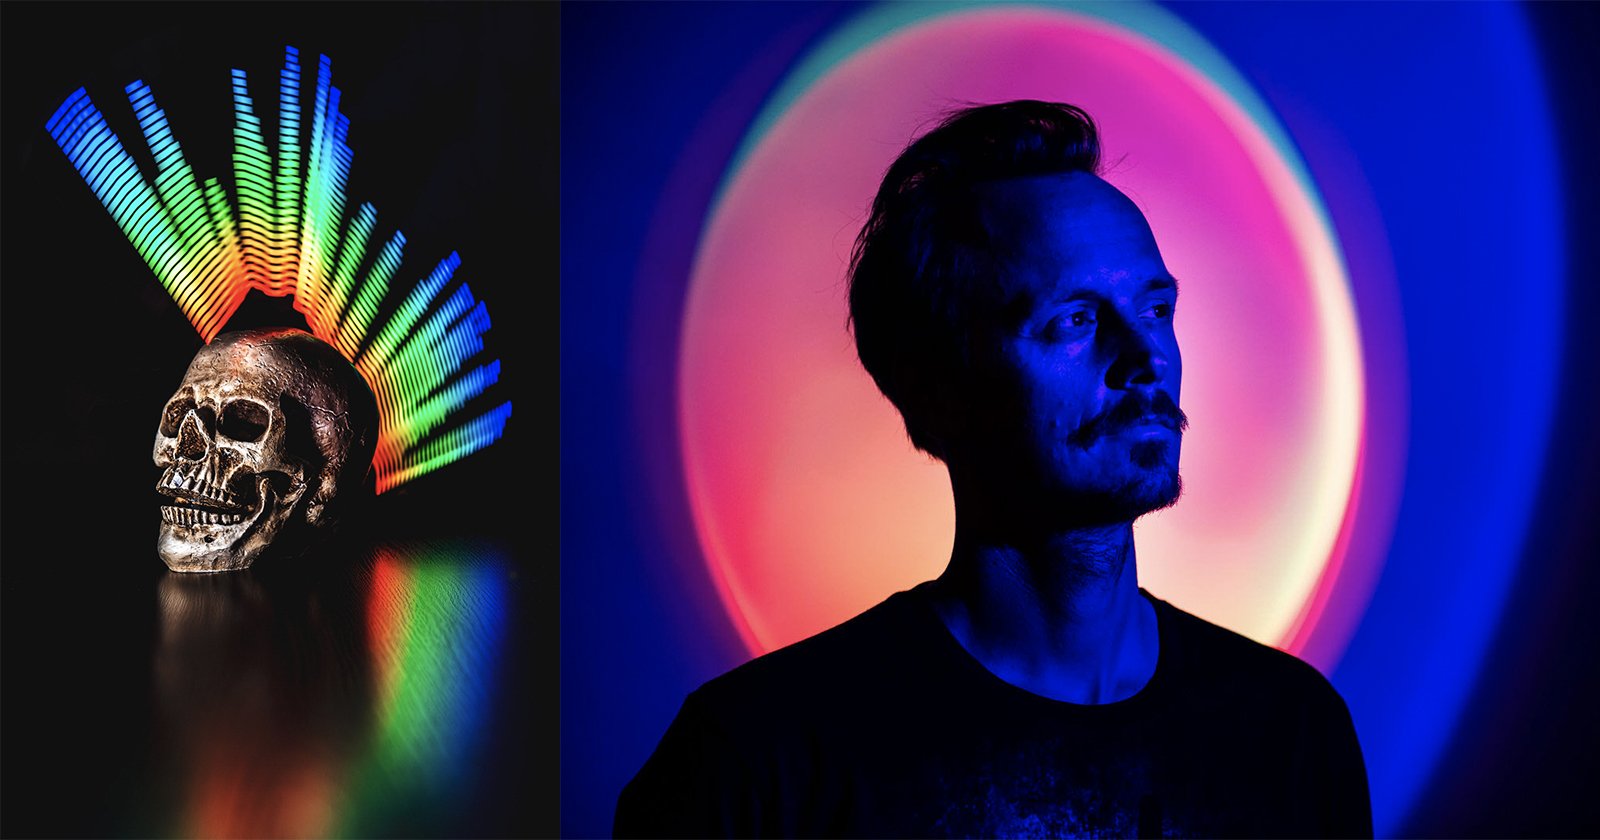
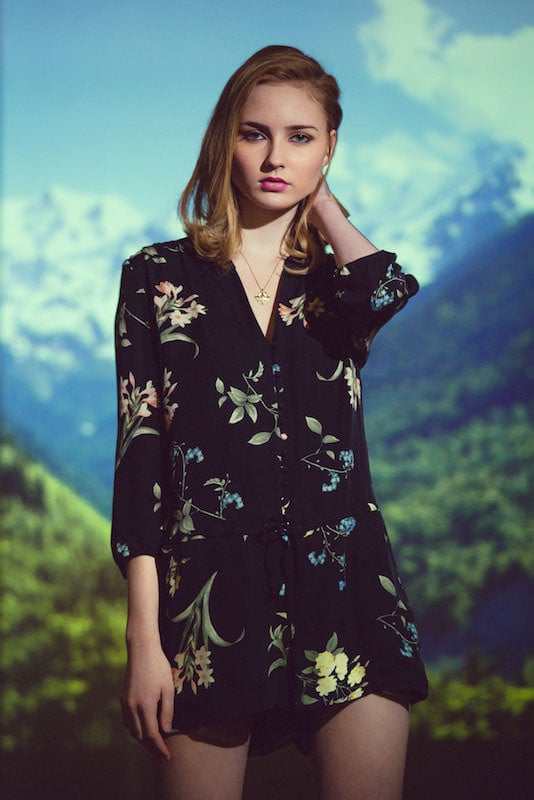
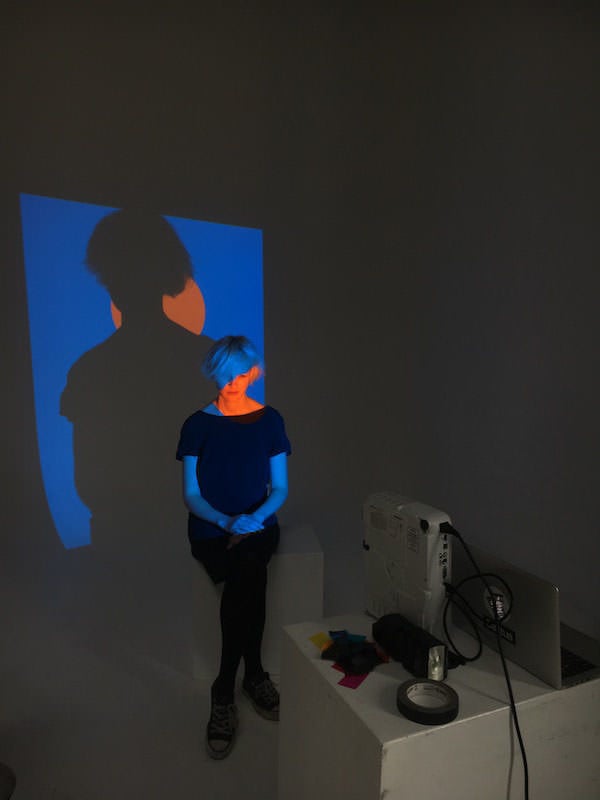
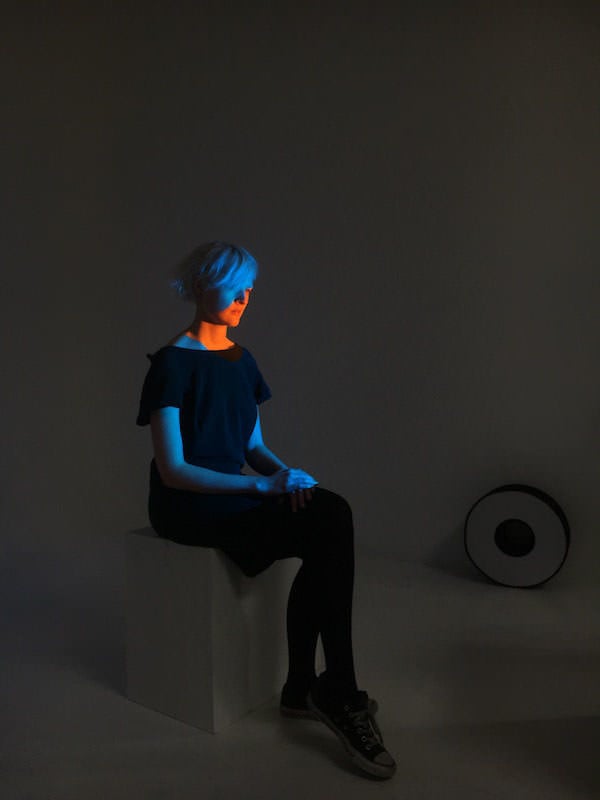
After deciding on which projector to buy, the next thing to consider is which images to project and where to get the images from. Many of the images that I use I created in Photoshop myself. I made simple shapes and patterns involving a range of colors, such as this orange circle on a blue background:

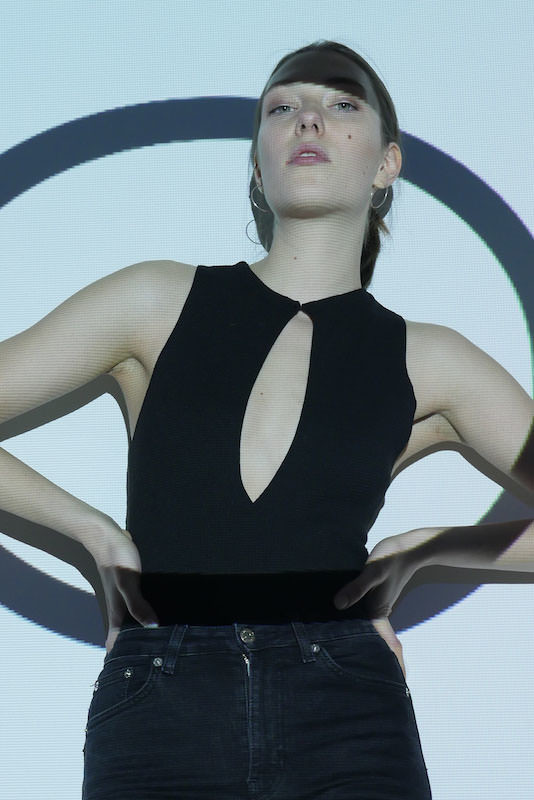
The next thing to consider is whether the image will be projected on both the subject and background or just on my subject.

Below, you can that my subject is about 6 feet away from the wall and about 3 feet from the projector.
Note how a simple change in my orientation in relation to my subject will determine whether the background is lit by the projector or in shadow. Now the subject is lit while the background goes to black:
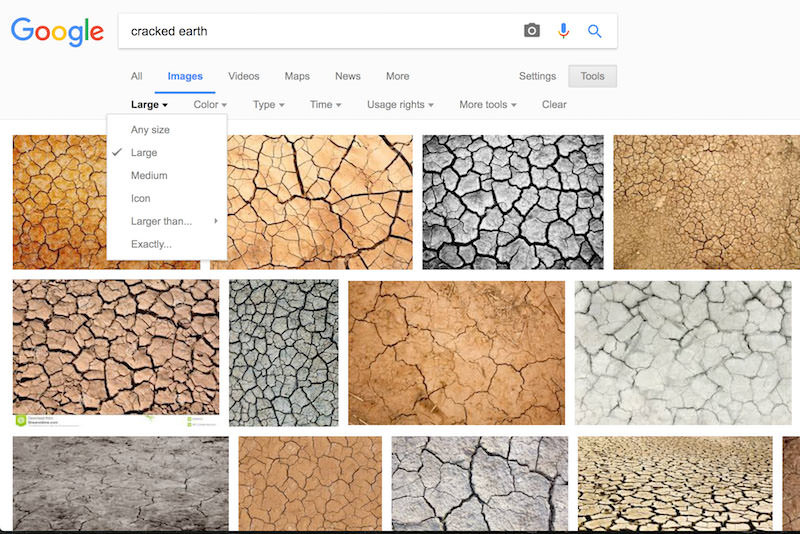
Another way to create images for projection is to modify already existing imagery. I search Google for my source images, making sure to set the search parameters to only look for large images.
You can also set the usage parameters to look for open license images, which is important if you’re using a source image in a way that it will still be recognizable (which I rarely do). Most of the time, I am just using the source image as a way to quickly create a pattern, rendering the final image unrecognizable.
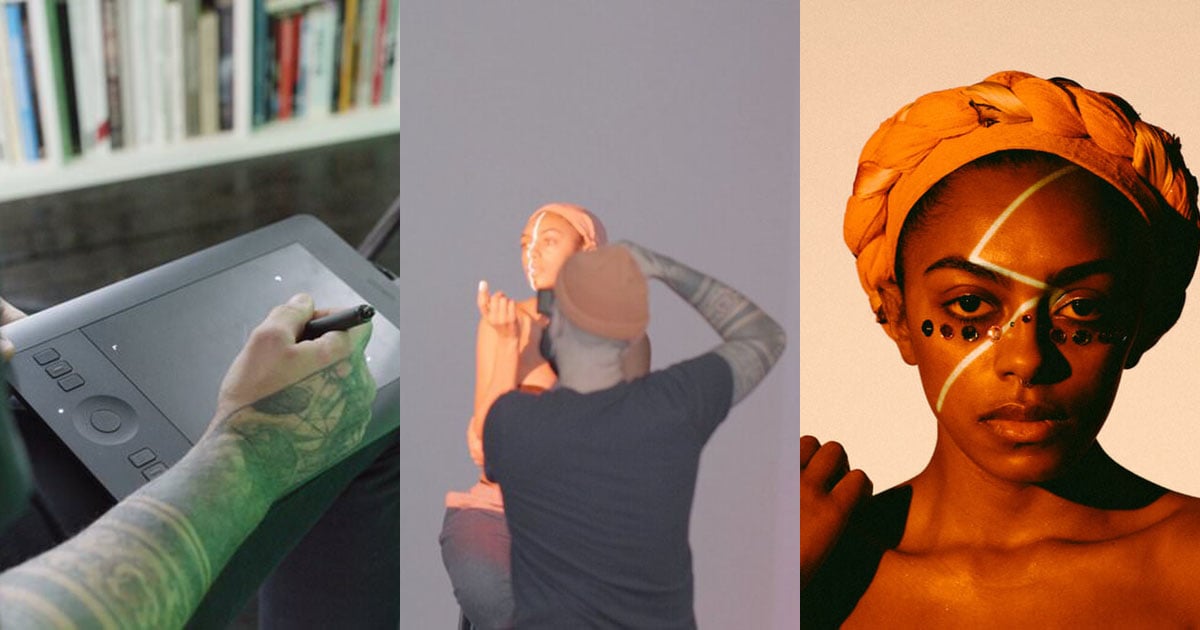
For example, I found an image of cracked earth that I liked and opened it in Photoshop.
I selected the magic wand tool, setting the tolerance to 50, which allowed me to quickly select most of the cracked portions of the image.
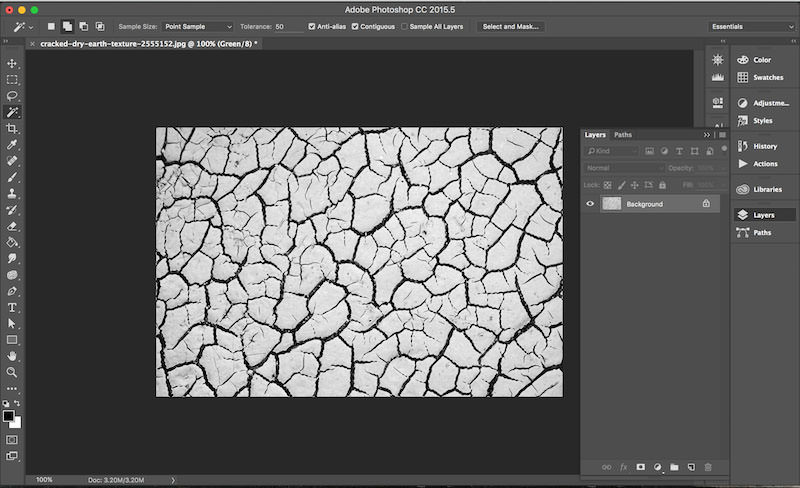
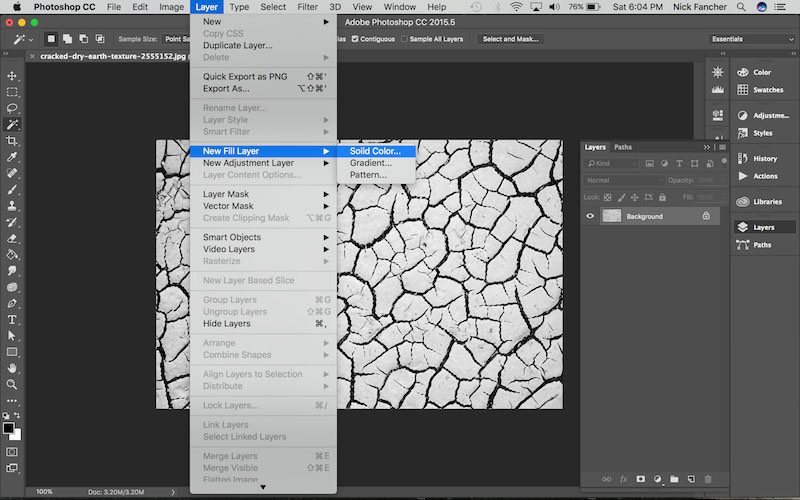
Had I wanted to make sure I got all the cracked areas, I could option-click and select the “similar” option to get every black crack in the image, but my initial selection worked just fine. Next, I created a fill layer, using the “solid color” option…
…and set the color to red.
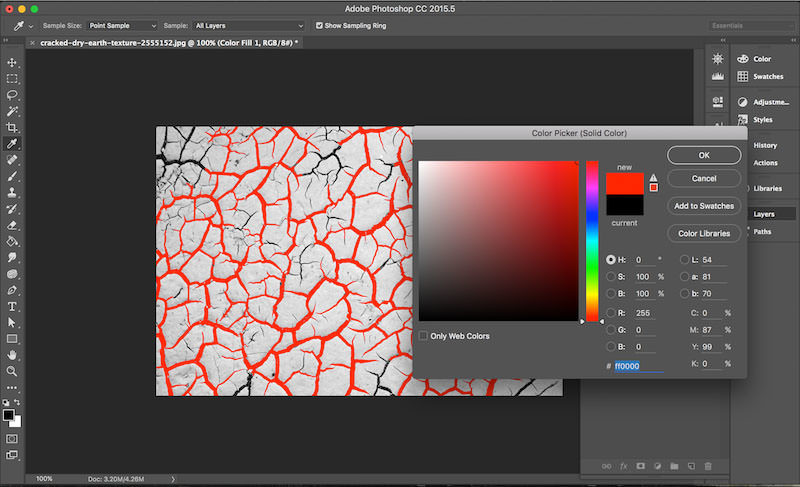
Now, when I delete the source image layer, I am left with just the red cracks.

I finish by making another fill layer, but this time selecting black and making it the bottom layer, making sure to flatten the image and save it as a JPEG.
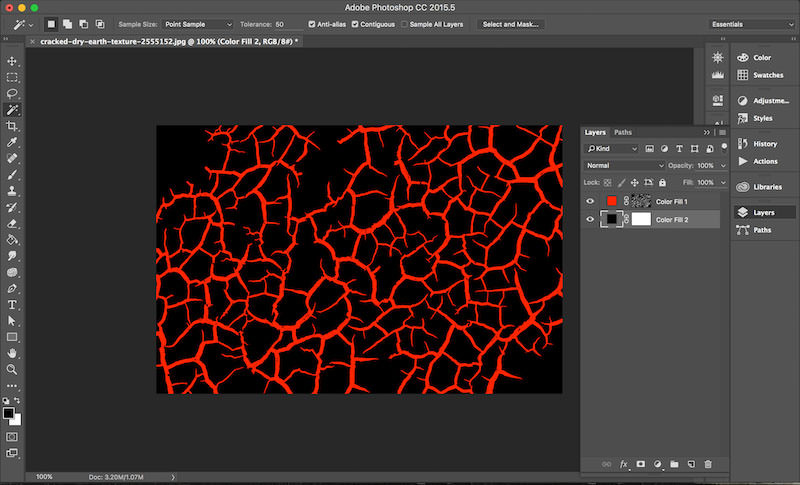
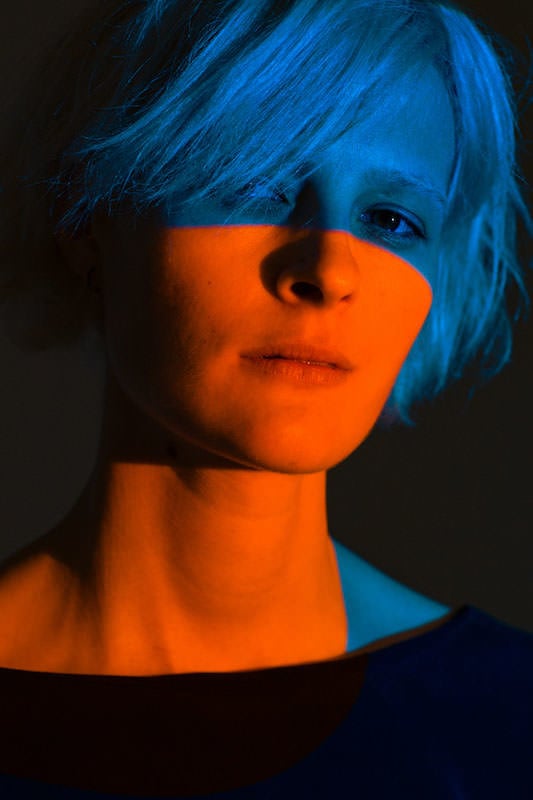
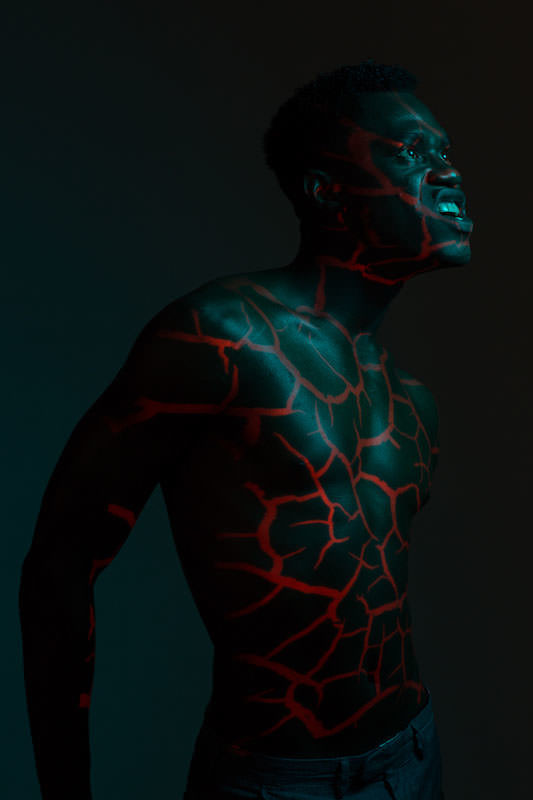
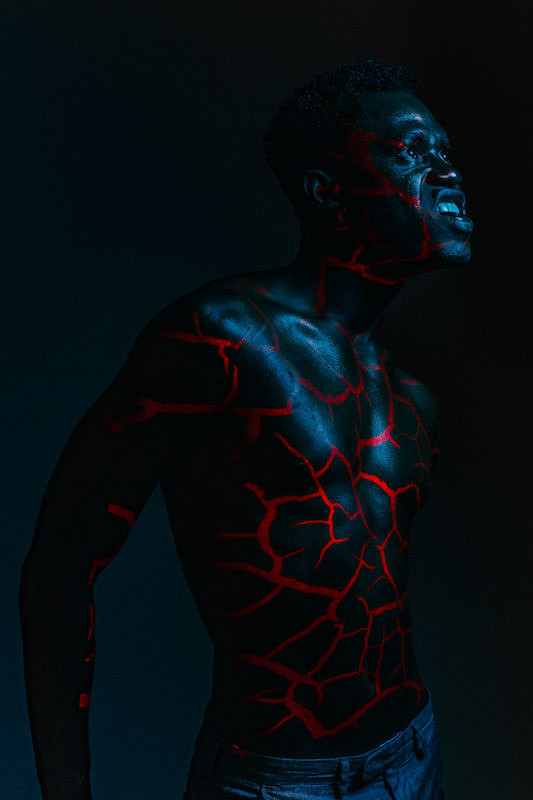
The only part of the original image that is left to project on my model are the vibrant red cracks.
I’ve made dozens of patterns that I (or my model) select from when making an image. Once an image is selected, I hook up my laptop to the projector and set my projector at a 90-degree angle (assuming I’m shooting a vertical composition). In this scenario, as is the case most of the time, my portrait compositions tend to be waist up or closer, meaning I can have the projector within 5-7 feet of the subject. This creates a brighter projection, and subsequently a faster shutter speed/lower ISO/smaller aperture, making it easier to eliminate any ambient room light.
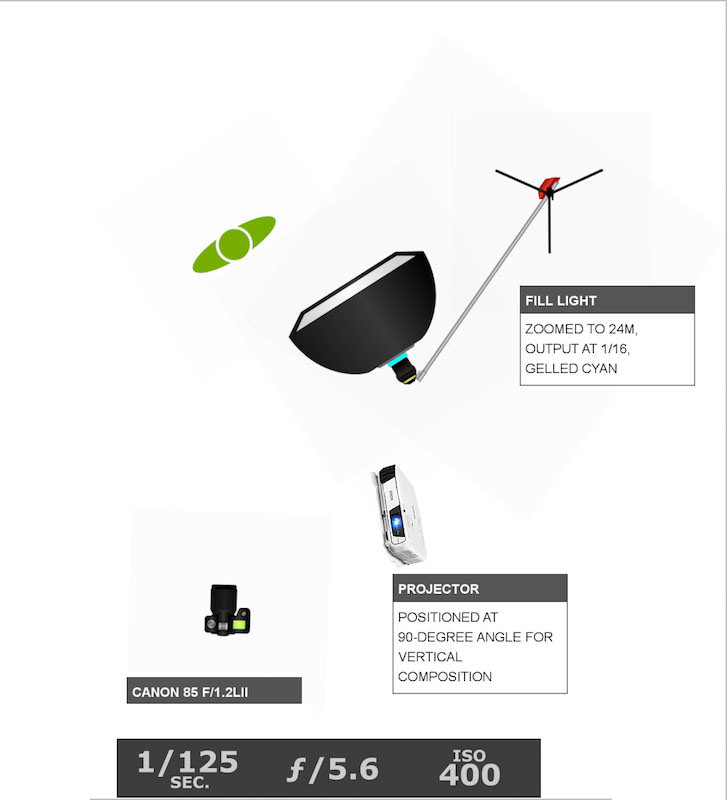
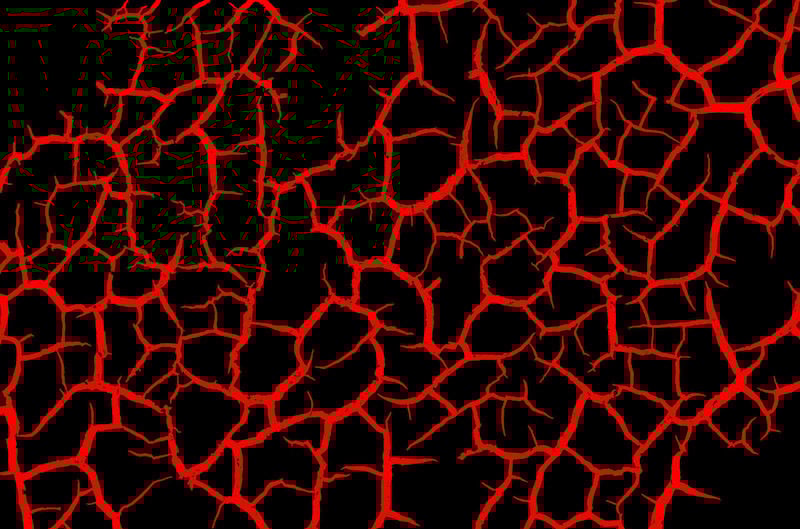
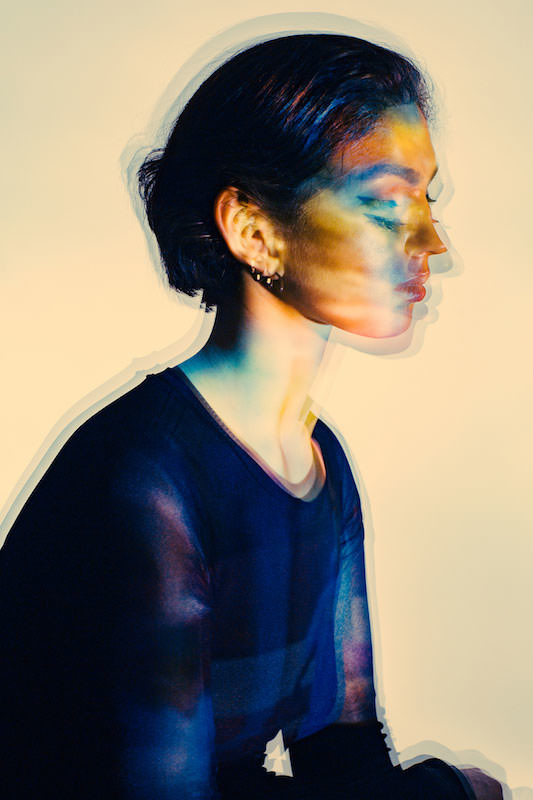
Below, you can see that I’ve projected the cracked earth image onto my subject. I also added a cyan-gelled softbox at a 45-degree angle from the camera, allowing for the camera side of the subject to stay in shadow.
As a starting point, I position my projector at the same angle as the main light, then take a test shot and determine whether or not to move anything. I’m not sure why exactly, but I view it as neutral and then determine if I want to vary it from there after seeing a test shot. One of the best parts about using projectors as a light source is that you can adjust the attributes of a projection in just a few seconds. Since my projector is already connected to my laptop, I can quickly open the texture in Photoshop, shift the hue to yellow or green, for example, or use the transform option to adjust thickness or rotation.
When it came to color grading this image, I was able to quickly pop out the red by raising the highlight area of the red tone curve and adjusting the Red and Green primary sliders in the Camera Calibration panel.
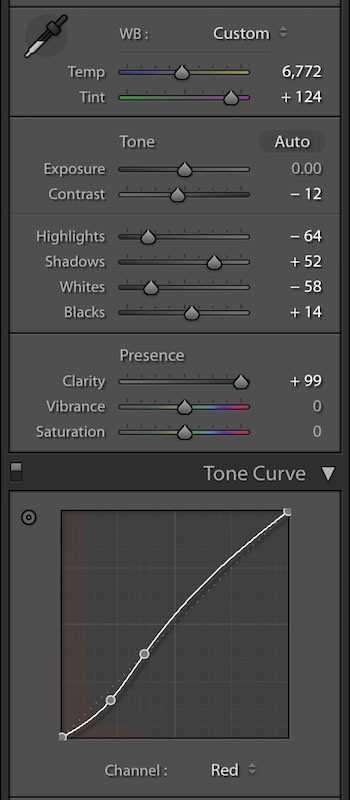
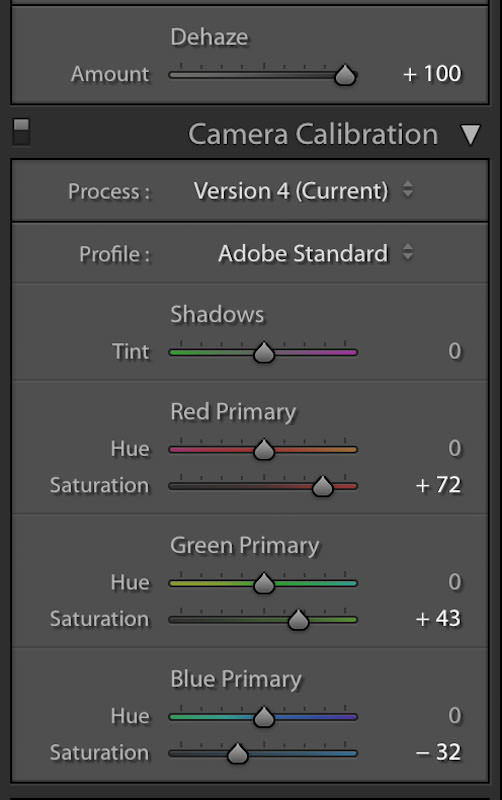
Aside from that, I cranked up the dehaze to add a dark drama to the overall image and bumped up the clarity to add muscle definition.
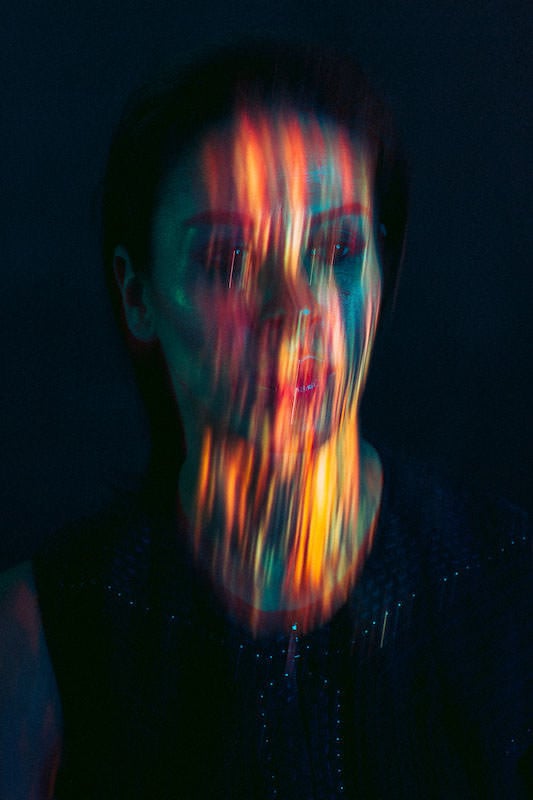
Once you learn how to achieve balance between a projector and strobe, begin experimenting with it. Play with projecting video or a slideshow while making multiple exposures. The changing images build up a colorful, abstract texture on the subject.
Or, since the projector is a continuous light source, add some shutter drag to add some abstraction to your projection. The options are literally endless. It’s pretty exciting (if not a bit overwhelming).
This article is an excerpt from Chroma: A Photographer’s Guide to Lighting with Color, which will be released via Rocky Nook this July. If you’re more of a hands-on learner, make sure to catch the Chroma workshop tour.
About the author: Nick Fancher is a Columbus, Ohio-based portrait and commerce photographer. You can also find more of his work and writing on his website and Instagram. His popular books can be purchased on Amazon.