How to Make a ‘2.5D’ Wedding Video: Bringing Photos to Life with Motion
My name is José Ignacio, and I’m a commercial and wedding photographer from Spain. I read a lot of blogs and magazines in search of inspiration — in this job there is a constant search for new ways of telling stories. The ‘2.5D’ technique always attracted me. I’ve seen it applied in other genres, but I wanted to use it in wedding photography.
1. Select the pictures
Not all photos can be used for 2.5D projects. Here are some prerequisites:
1. The picture needs to represent an action.
2. It must have depth. Different elements at different distances from the camera.
3. The sequence of the pictures have to tell a story.
2. Cut the layers
It’s time to cut the elements found at different distances from the camera into different layers.
3. Fill the empty background
Later on we will add movement in After Effects. That will make visible the empty areas of some layers, so you’ll need to fill in these areas.
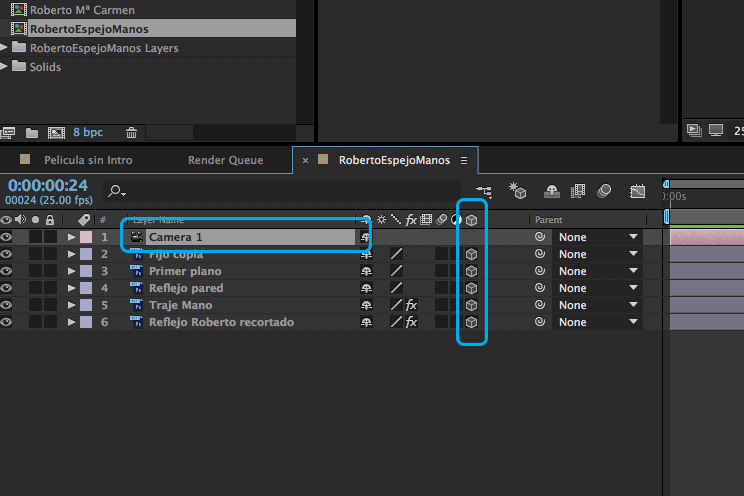
4. Z Position the layers in After Effects
We must import the .PSD file with the layers into After Effects. To position the layers in the Z axis, first we have to add a camera to the composite and activate the 3D layer option in each layer.
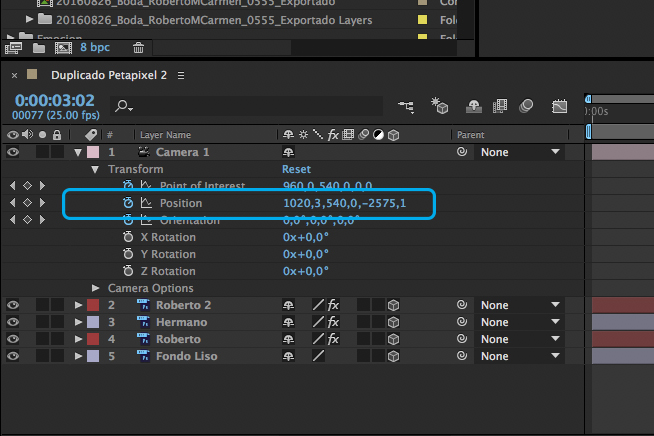
Now you can select each layer and change the Z position and the scale. The idea is to move the elements’ Z positions to recreate the distance in reality and then change the scale to keep the aspect. If you bring the element near the camera you have to decrease the scale and vice versa.
5. Add camera movement
With the elements in their position, now it’s time to create the camera movement. Set the key frames and change the position of the camera in them. This will create a camera movement.
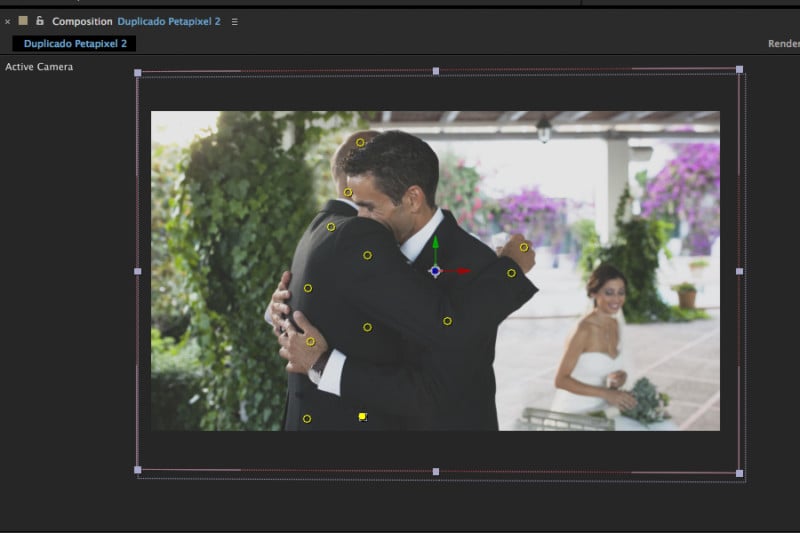
6. Add movement to elements
After Effects has the Puppet Pin Tool that let you animate the elements like a puppet. Add pins to the elements, then add key frames and change the position of the pins. You’ll have to play the animation several times and move the pins until you get the effect that you are looking for.
And that’s it! You’re ready to export and share your 2.5D video. Sometimes you will choose pictures, but after working with them you find that they won’t give you the result that you want. Just select another photo that fits in the story you want to tell. Patience is key in this kind of work, but the results are worth it.
About the author: José Ignacio is a commercial and wedding photographer based in Spain. You can find more of his work here and here.