Finding and Photographing a Lunar ‘Fog Bow’: What to Look For
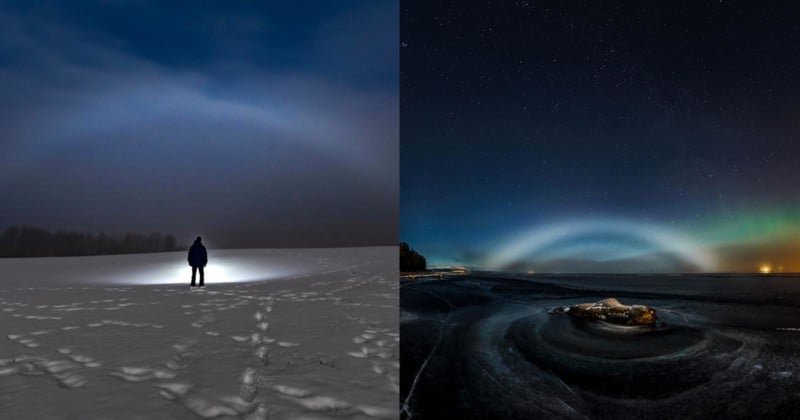
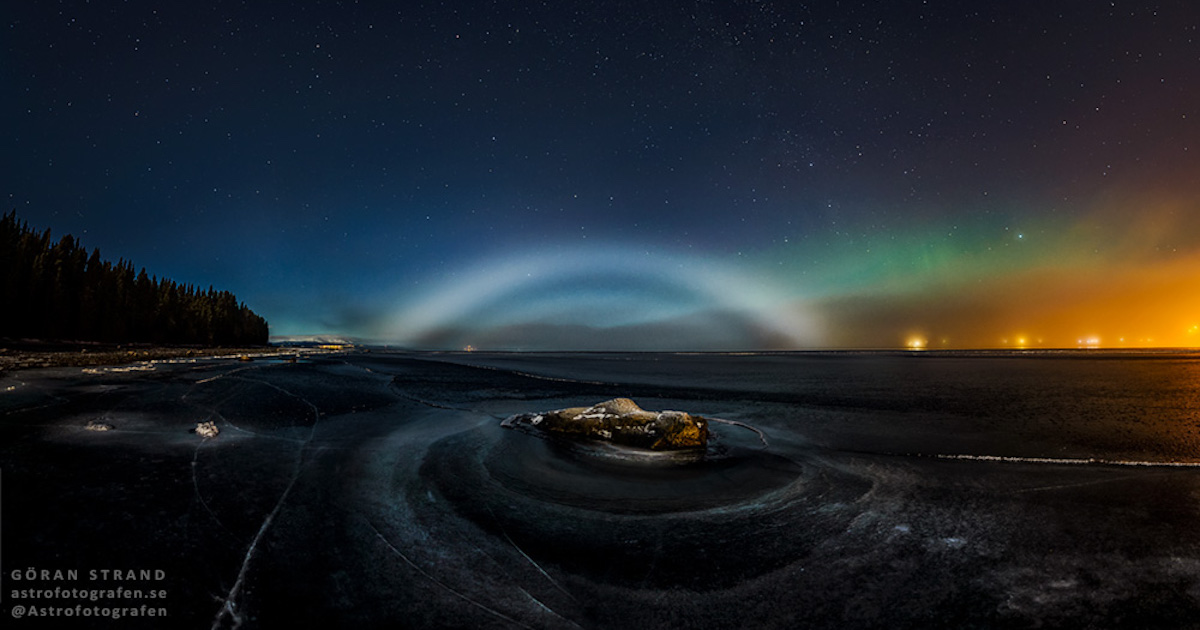
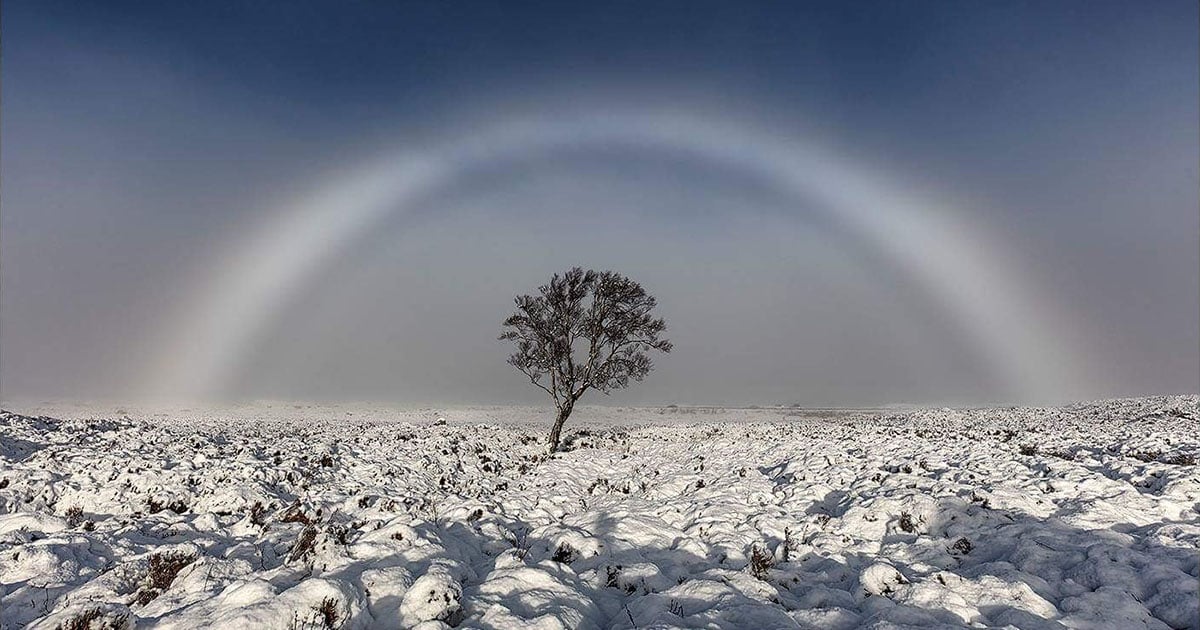
A month ago I had never seen a lunar fog bow; now I have seen three. I got to see my first lunar fog bow on December 17th, and last night I got to see two more of these elusive phenomena. We had lots of fog around the city of Östersund and since it was the night of the full moon, I drove around chasing locations where I could see this beautiful phenomenon.
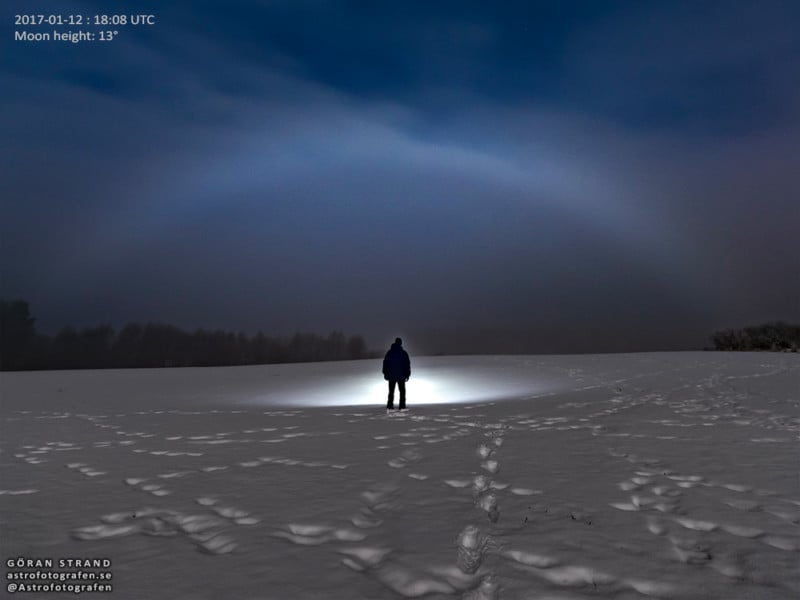
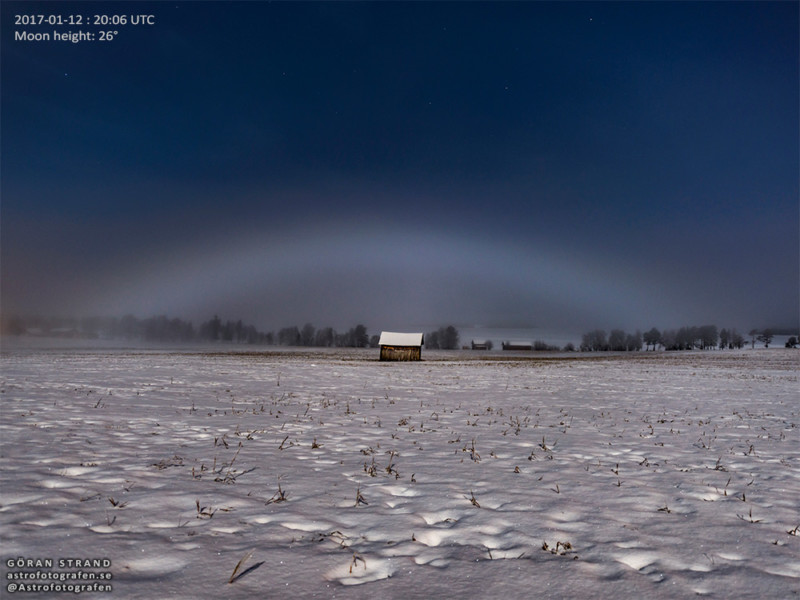
I photographed two relatively good ones two hours apart and included the time and height of the Moon when the photos was taken for reference.
This is something I really love with this type of photography, learning about new phenomena and uncovering how and when to see them. After seeing my first lunar fog bow I knew what conditions to look for, and last night it was just a matter of finding the right spot.
Here’s what you should look for:
The moon light needs to be bright, so the days around full moon are best. Also, the light from the moon can’t be too obscured by the fog, and you need to have rather dense fog in the opposite direction of the moon. Try to find a location where you’re standing just beneath the top of the fog; that way you’re inside the fog but the moon light is still bright enough to light up the bow.
Also, as you can see by the two photos above, a lunar fog bow works exactly the same as a rainbow—in other words: the height of the bow is determined by the height of the light source (Sun/Moon). So, if the moon is too high in the sky (> ~35°) the fog bow won’t be visible.
A rainbow has a radius of 42° so if the Sun’s altitude in the sky is more than 42°, a rainbow can’t be visible. The same goes for a fog bow, but it has a much broader range, 30-45°. So, the lower the altitude of the Sun/moon is, the higher the bow is.
Good luck bow hunting!
About the author: Göran Strand is a professional photographer based in Östersund, Sweden. You can find more of his work on his website, Instagram, Twitter, and Facebook. This article was also published here.