Dina Belenko is a creative still-life photographer from Russia, and a successful 500px Marketplace photographer. Her artistic images capture magical stories behind everyday inanimate objects. In this tutorial, Dina shows you how she makes liquid come to life by creating crazy splashes that defy gravity with just a few simple steps. Read on, then grab your glue gun, and go try this at home!
Since I live in a small, provincial town at the End of the World, I don’t have access to any fancy machinery to help me shoot splashes for my photos. I can only daydream of having a machine that can pour liquid at exact angles, with precise speed—definitely not something I can easily pick up in a local store. If you’re a still life photographer wanting to capture unique images, you might be having the same problem. This doesn’t mean we should miss out on all the fun and resort to keeping our still life images—well—still. I’m here to show you how you can shoot a dynamic image with falling cups and splashing liquid using only two speedlights and a glue gun.
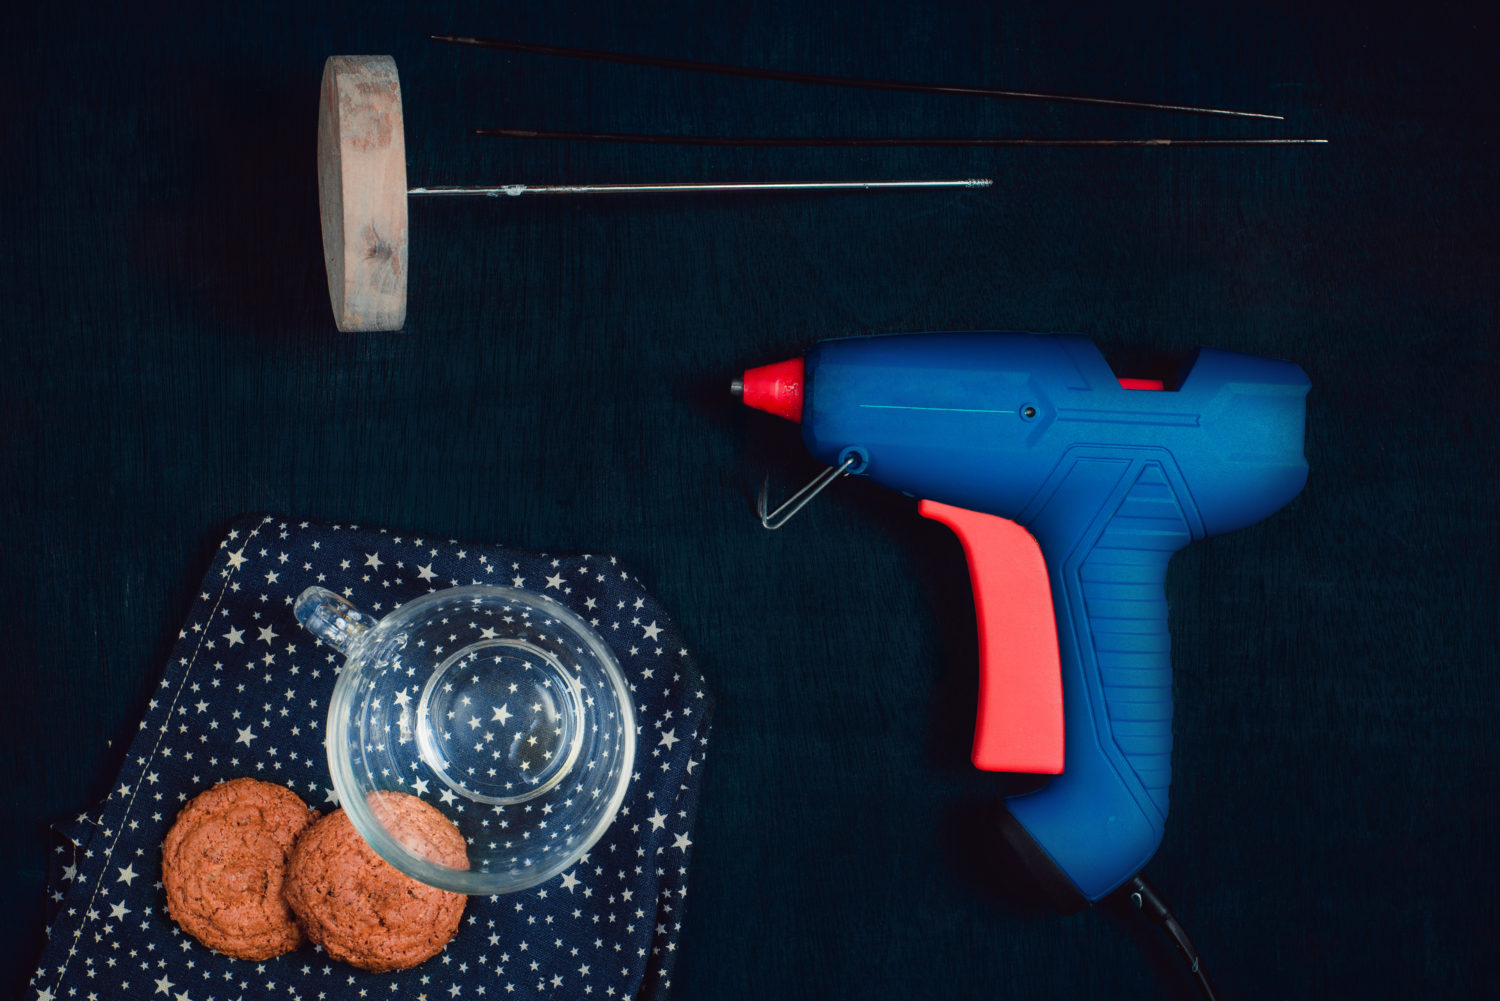
The key to shooting splashes is to have as much control as possible. Precise control of pouring liquid is very hard to achieve, but we can control how our “falling” cups steady in the air. For this work, use professional clamps or improvised tools, like knitting needles and a glue gun. As for camera gear, you’ll need a camera, tripod, and any light source, suitable for shooting at high speed. In my case, I used two speedlights—one inside a small softbox and another behind a large diffuser. A remote would be a big help too, but it’s not a requirement. Let’s do this!
1. Collect the props.
Gather all the things you need for your still-life. You’ll need a couple of coffee cups, some cookies, a couple of sugar cubes—anything you find suitable. Don’t forget you’ll need lots and lots of coffee. You’ll also need your support for the “falling” cups and a glue gun.
2. Composition.
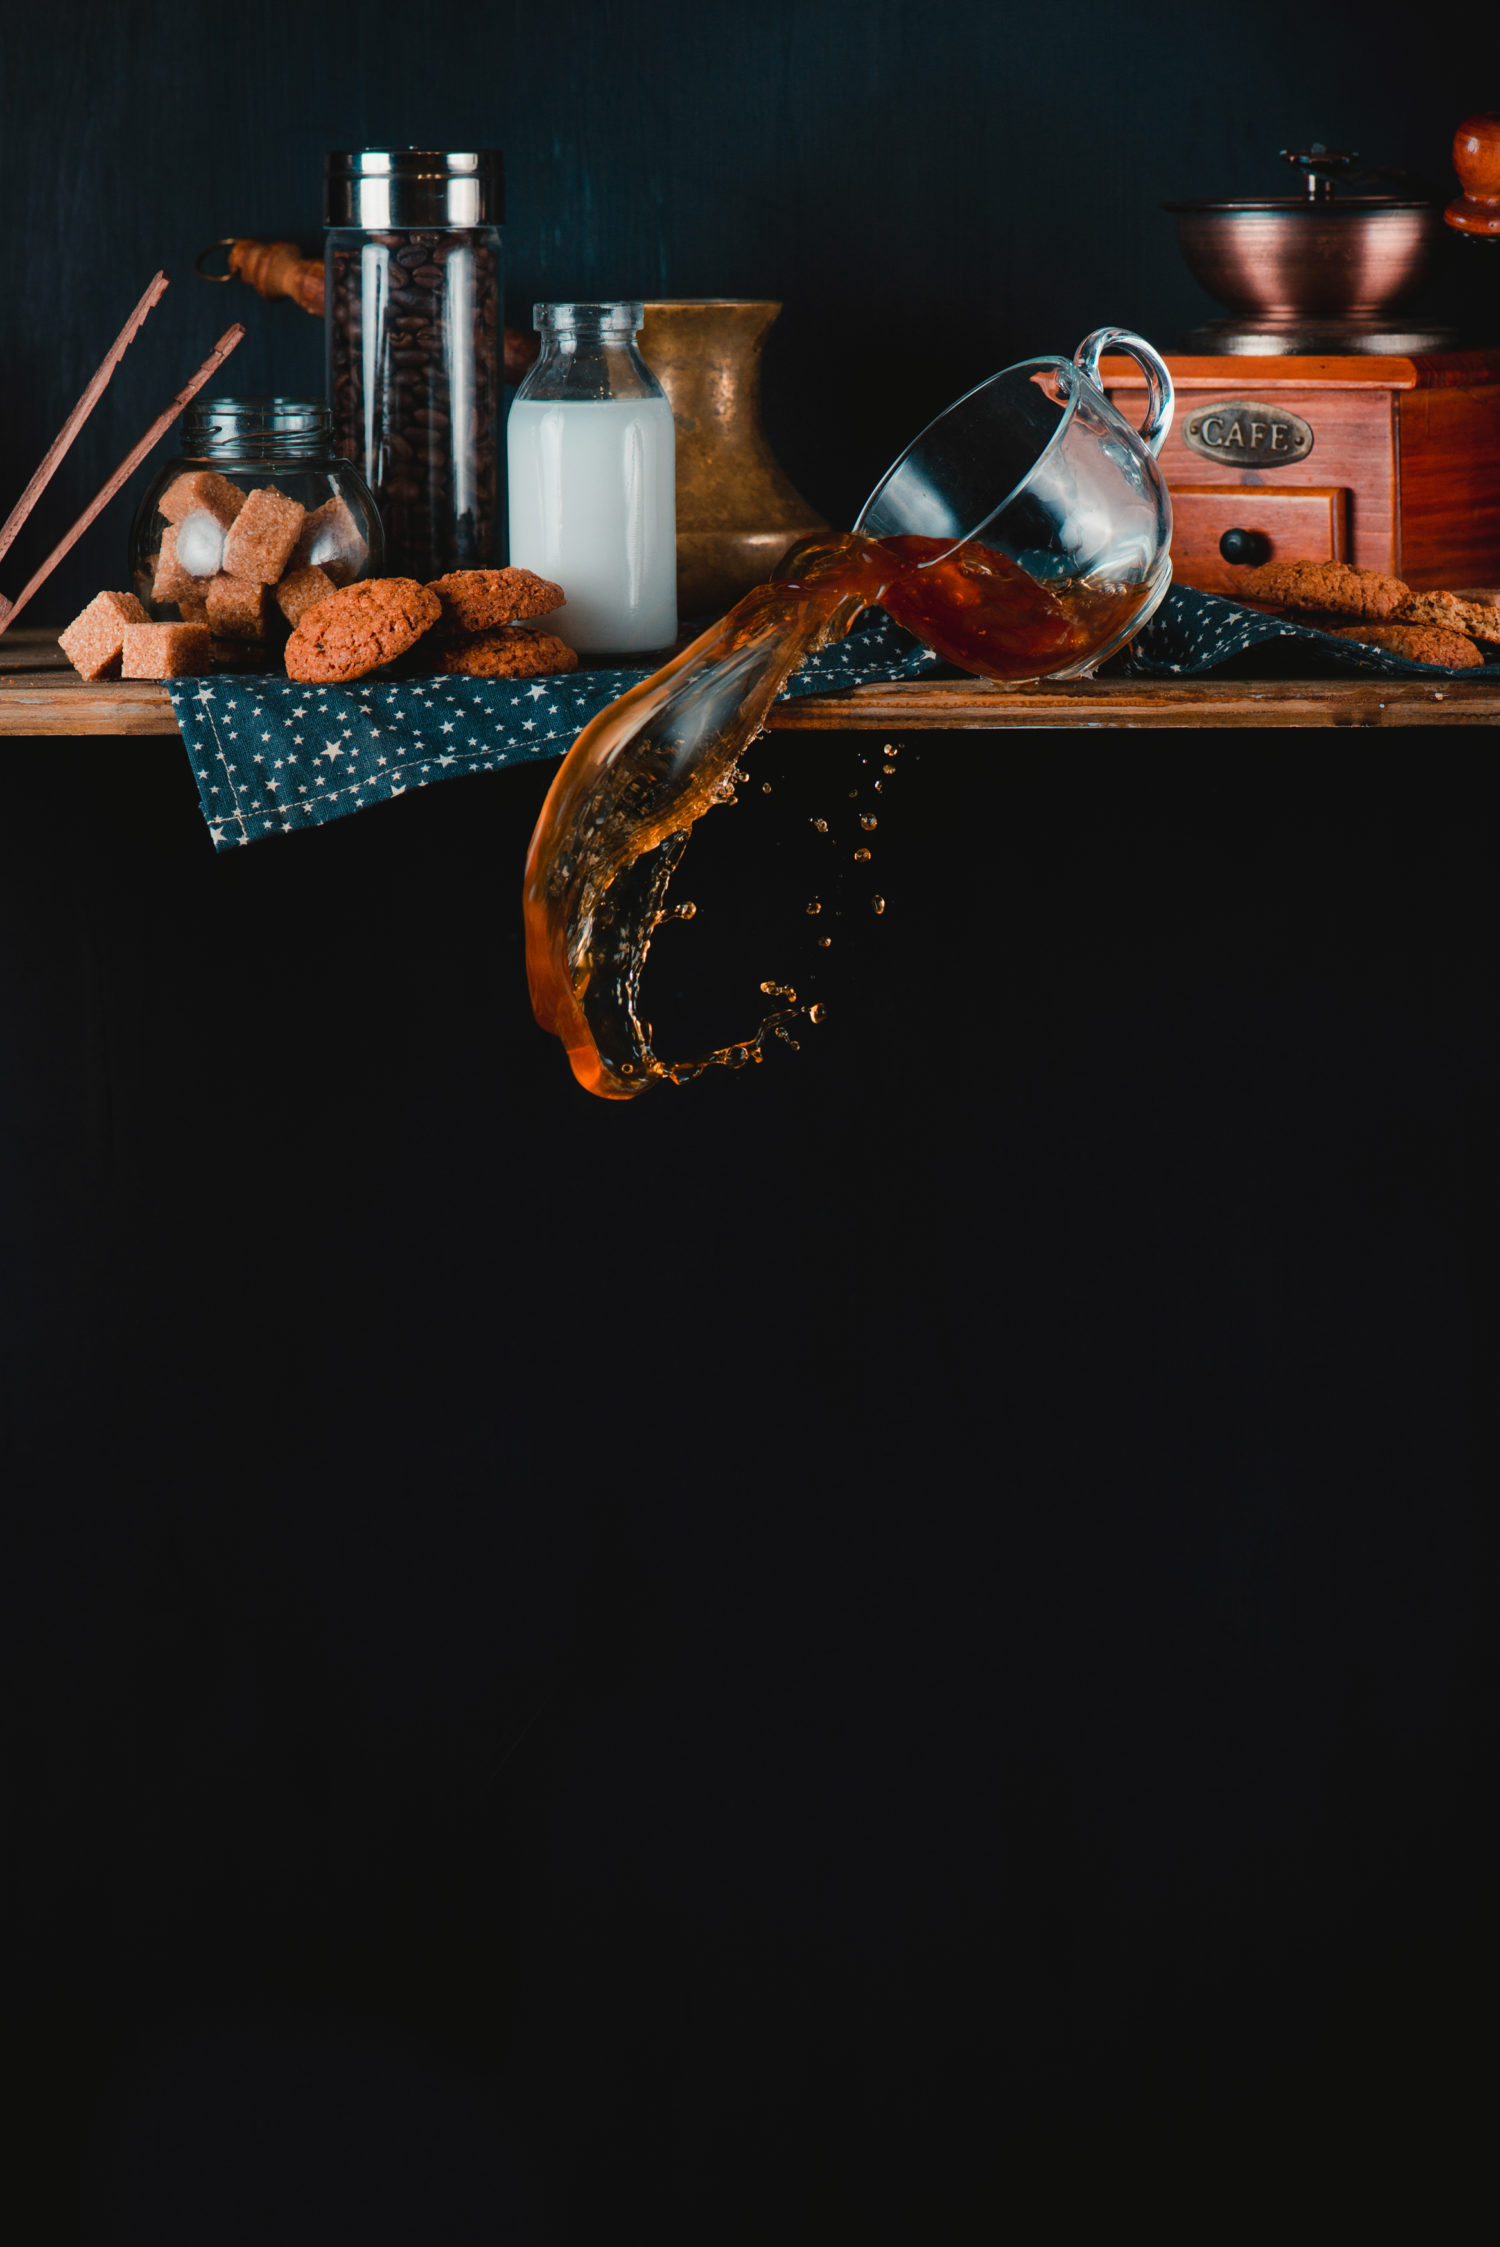
Arrange a composition and leave some space for a future splash to appear in your shot. In my case, the whole bottom part of an image is almost empty, so moving liquid wouldn’t ruin any important parts of a still-life.
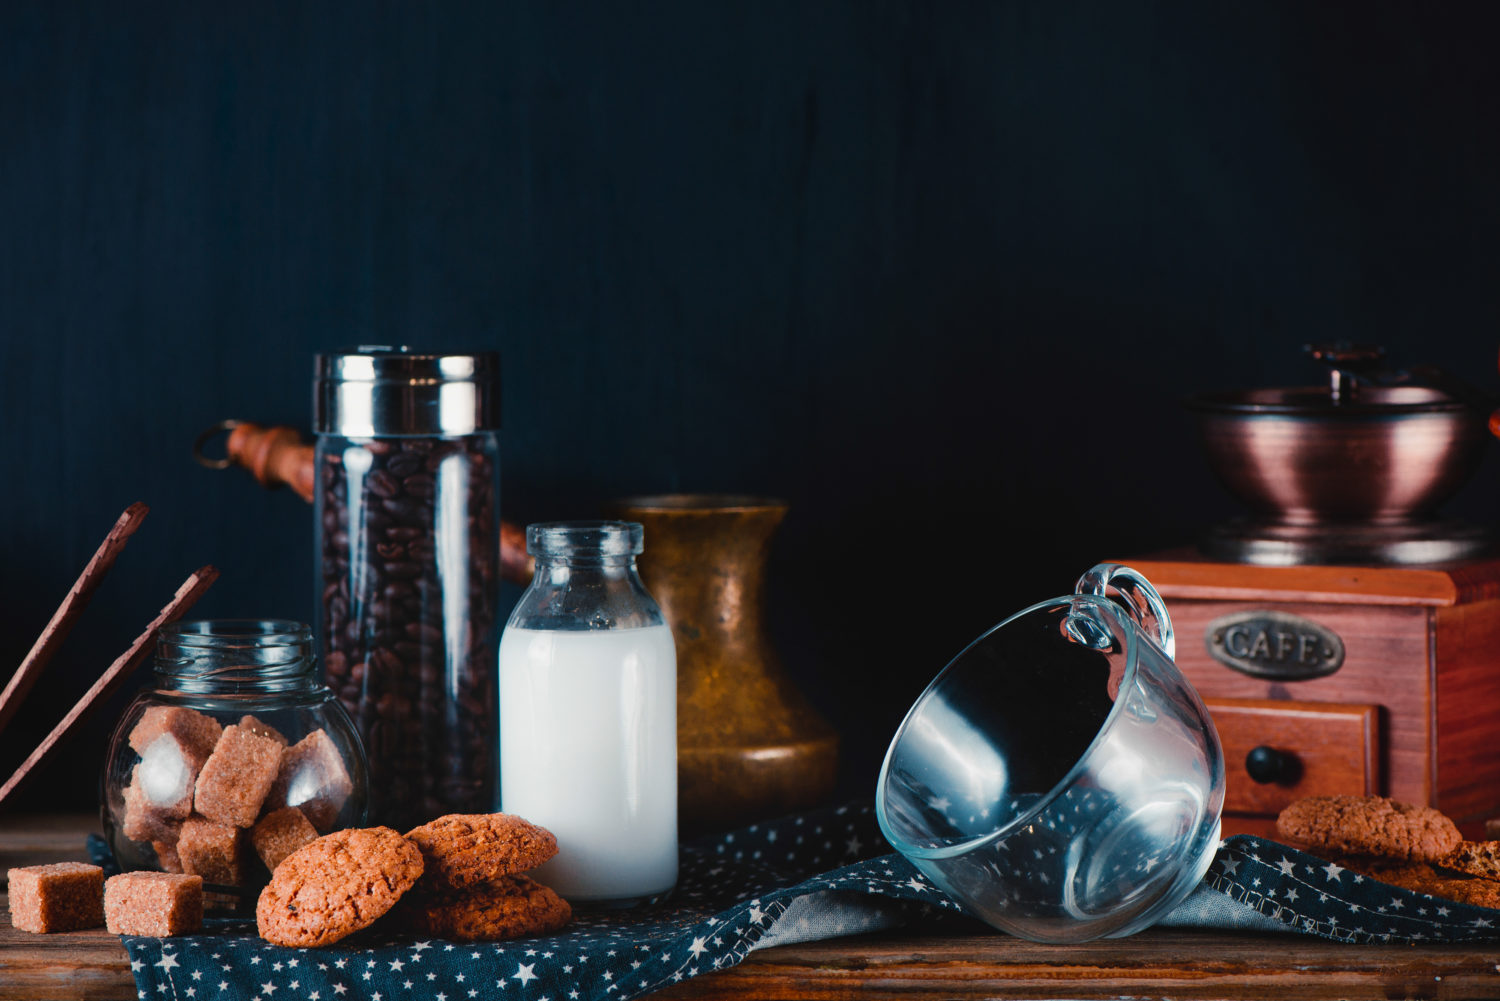
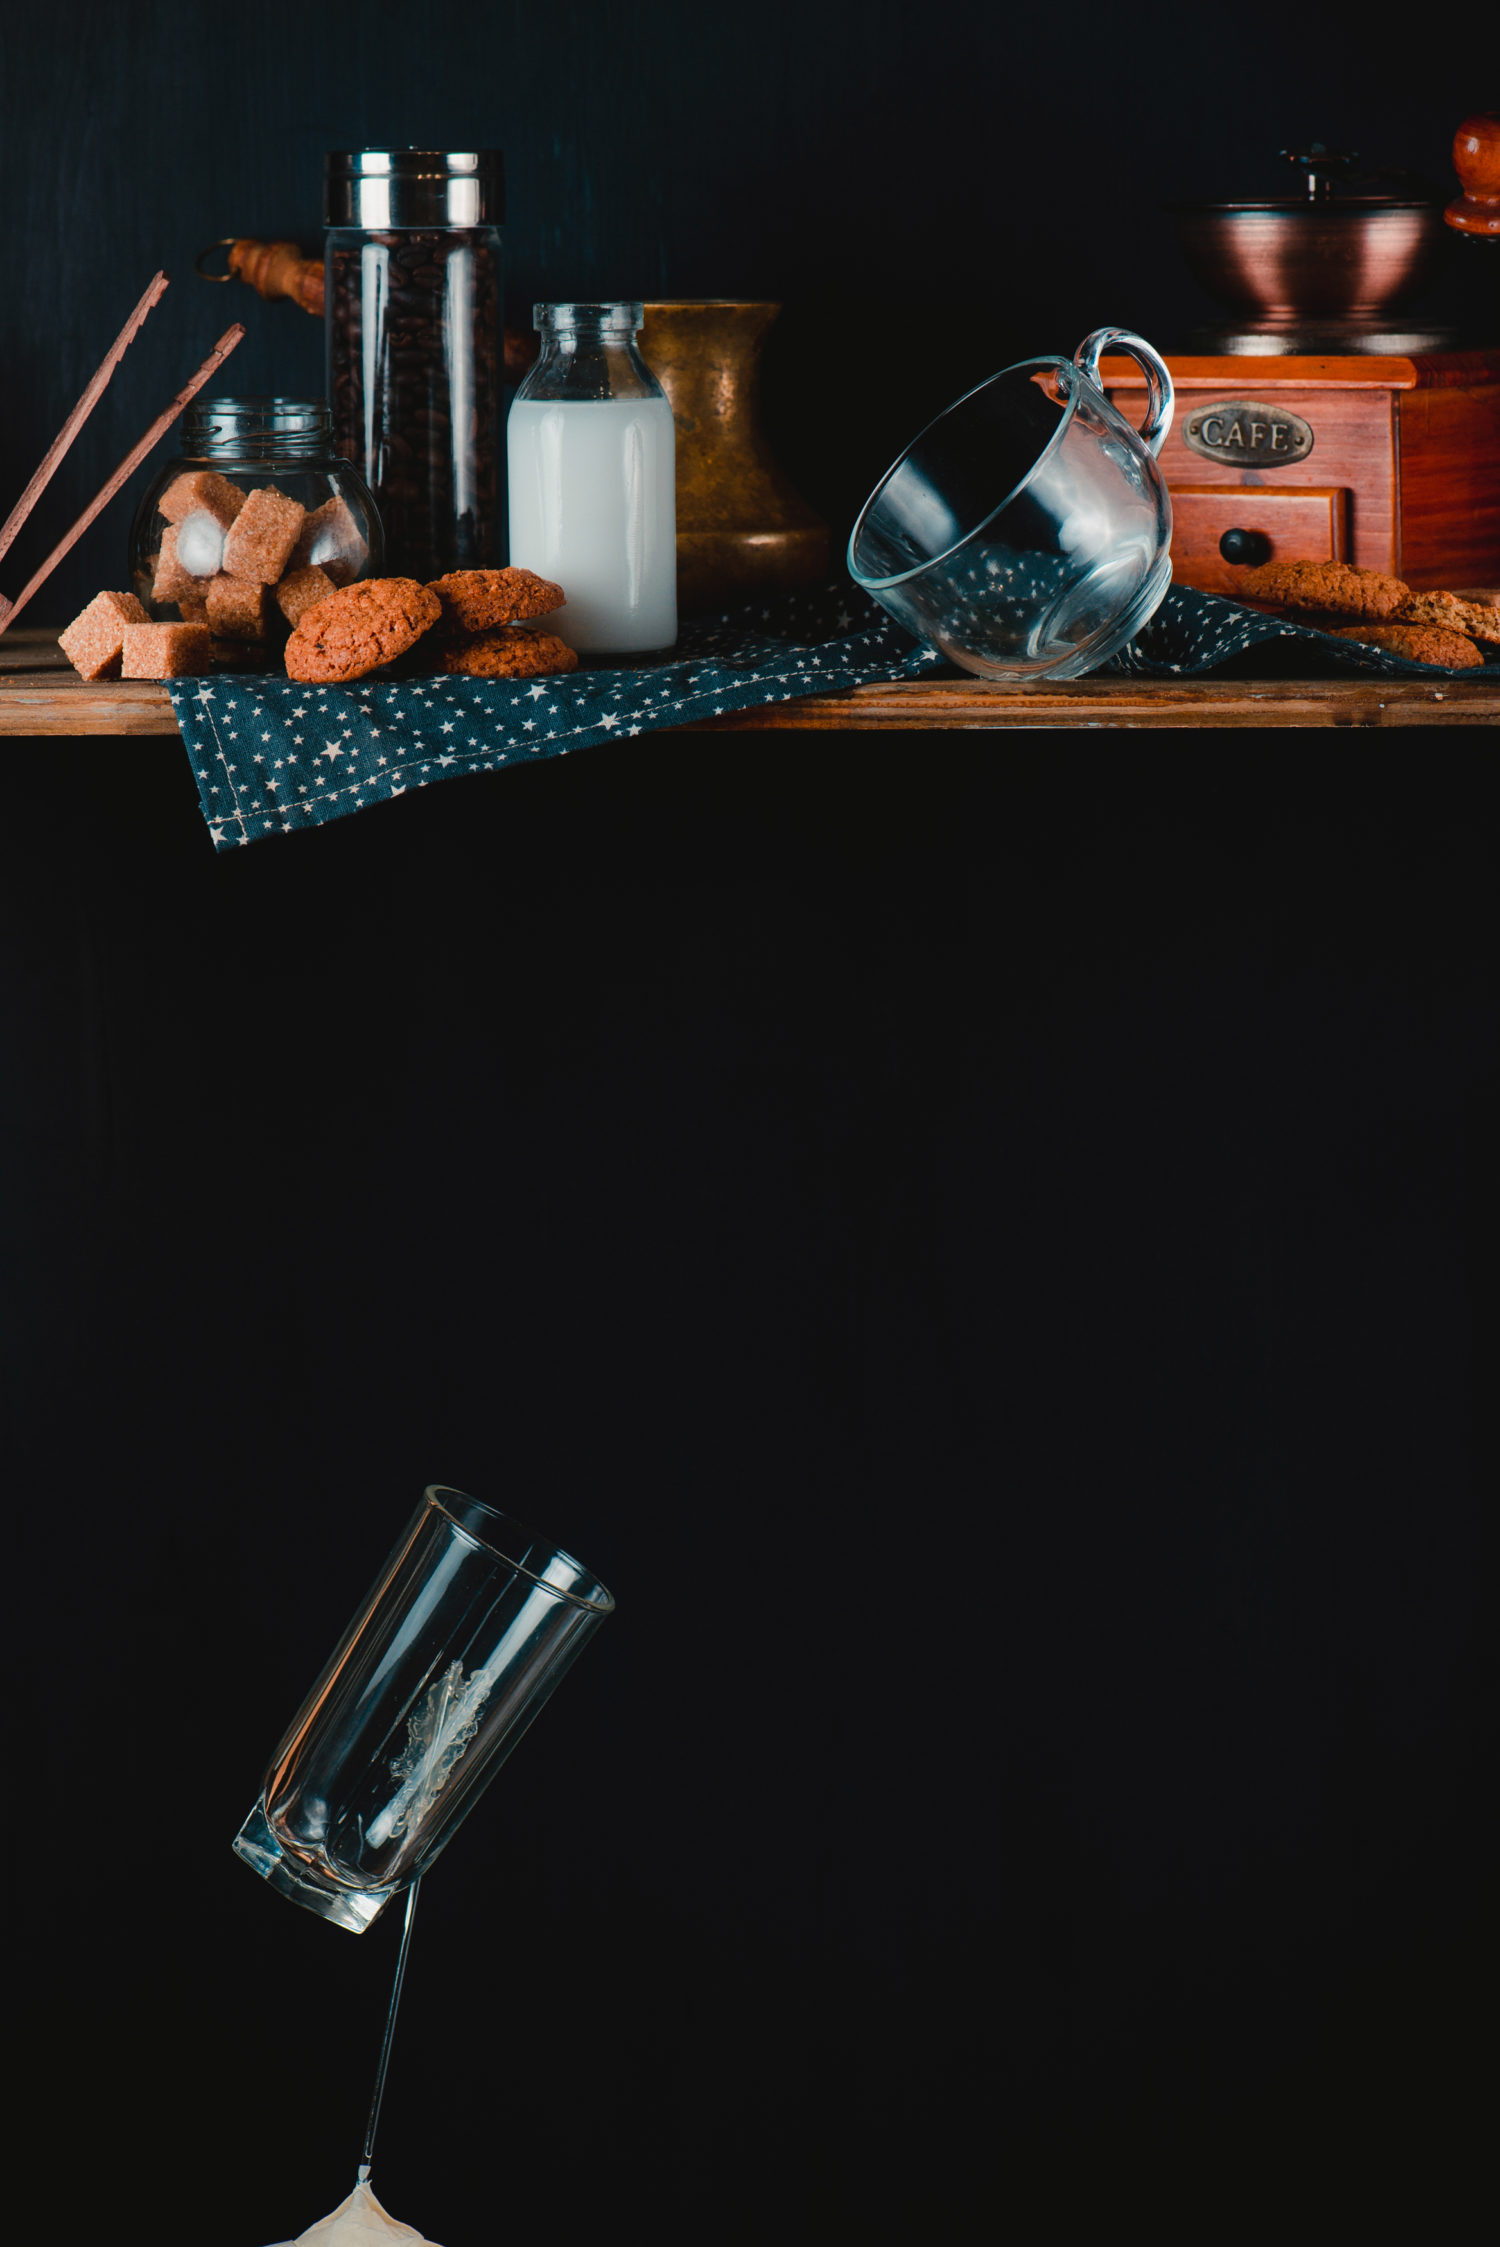
Glue the cups that supposed to be “falling” together to support, and fix them steadily in place. In my case, I glued a milk glass to a knitting needle.
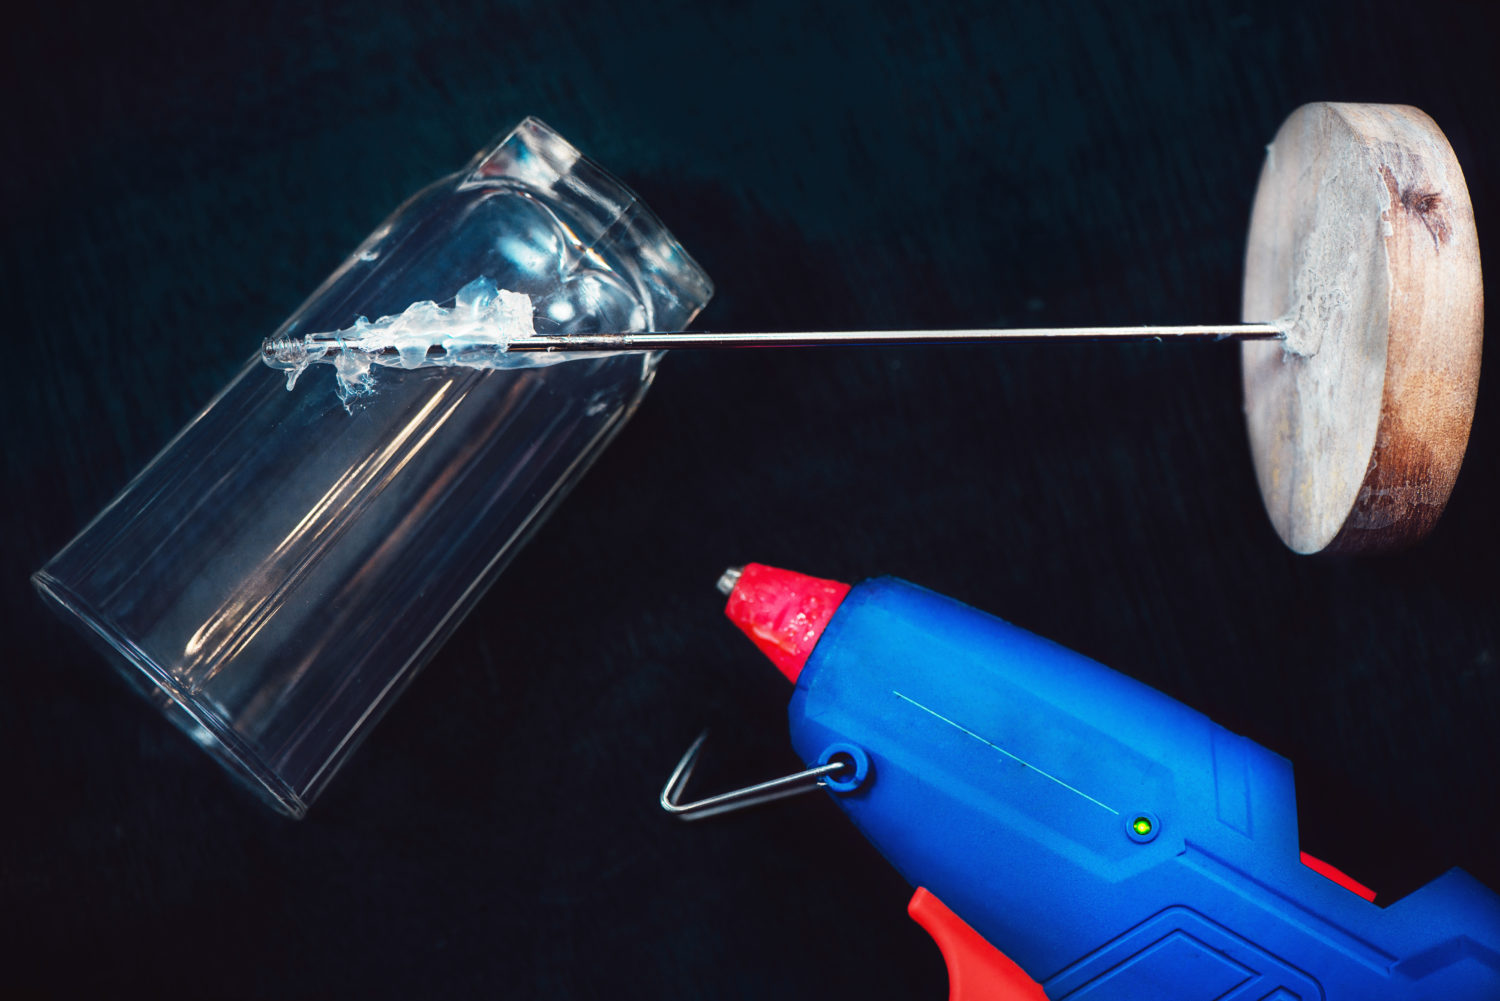
This needle can be easily removed during post-processing. I also glued a coffee cup in the position of being knocked over to a shelf.
3. Lighting and camera settings.
The scene is lit with two speedlights, set on the low power (from 1/16 up to 1/128 power provides a very short pulse that will freeze the motion of liquid). One is working as a key light from the left and slightly behind the scene. The other one is working as fill light on the right. Since we’re working with flash, set your shutter speed to the flash sync speed—usually between 1/160 sec and 1/250 sec. From there, take a test shot to establish what maximum aperture you can get without underexposing an image. Set your camera on a continuous mode to make several shots in a row, and focus manually on the main object.

4. Shooting.
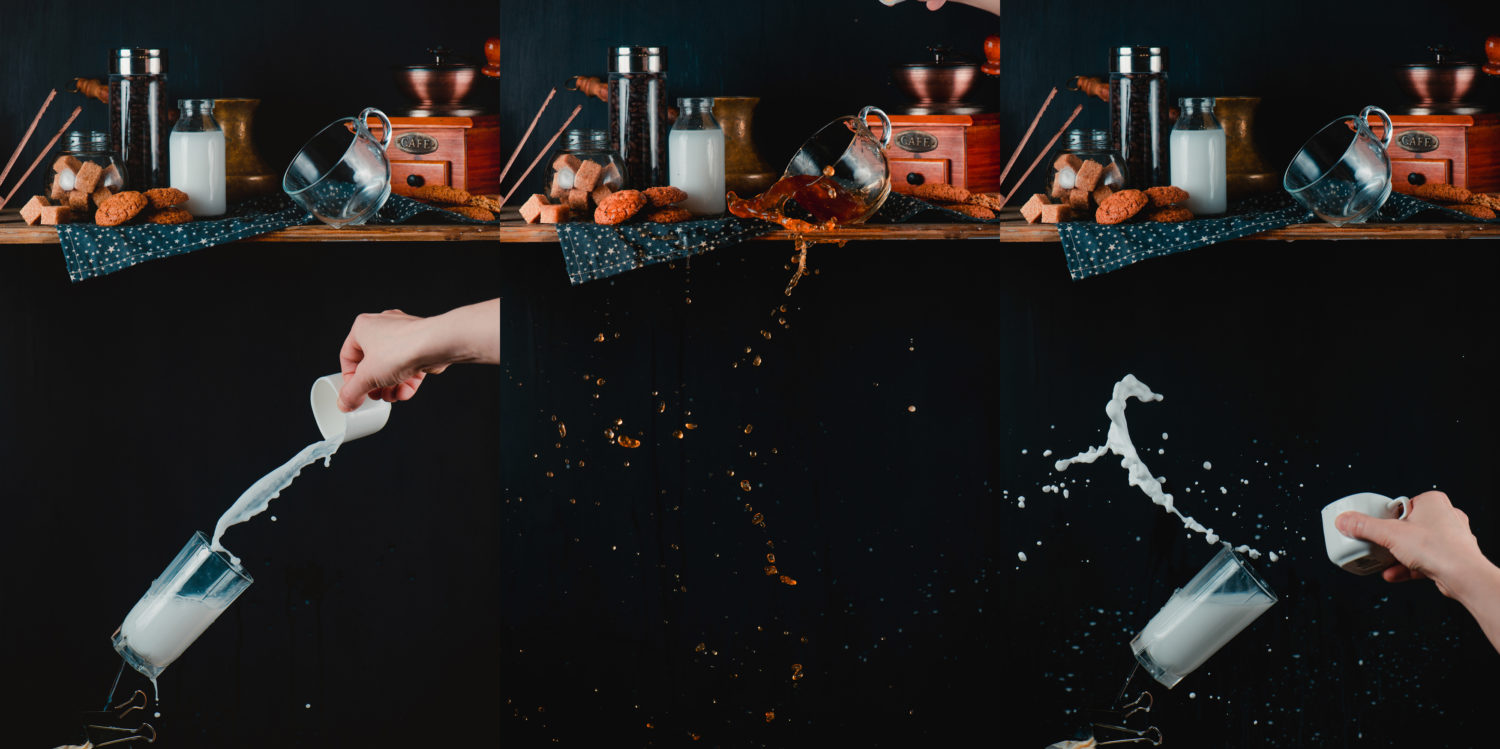
This is the best part! Pour some liquid into a cup and take a sequence of shots. Because cups are fixed in place you can try shooting several times without ruining the scene. Try different amounts of liquid and experiment with different angles before you create a splash closest to ideal one you want. And most importantly—have fun!
5. Post-processing.
Choose the most beautiful shots, and then combine them together. To do this, paste each frame into a new layer and use Layer Masks and brush to reveal the details you like. In my case, there are two mains shots—one with coffee and one with milk—and some drops added from other iterations. Retouch all visible supports.
I did it using Clone Stamp. Then, give the picture a little polish by deleting drops you don’t like, or adjusting colors and contrast.
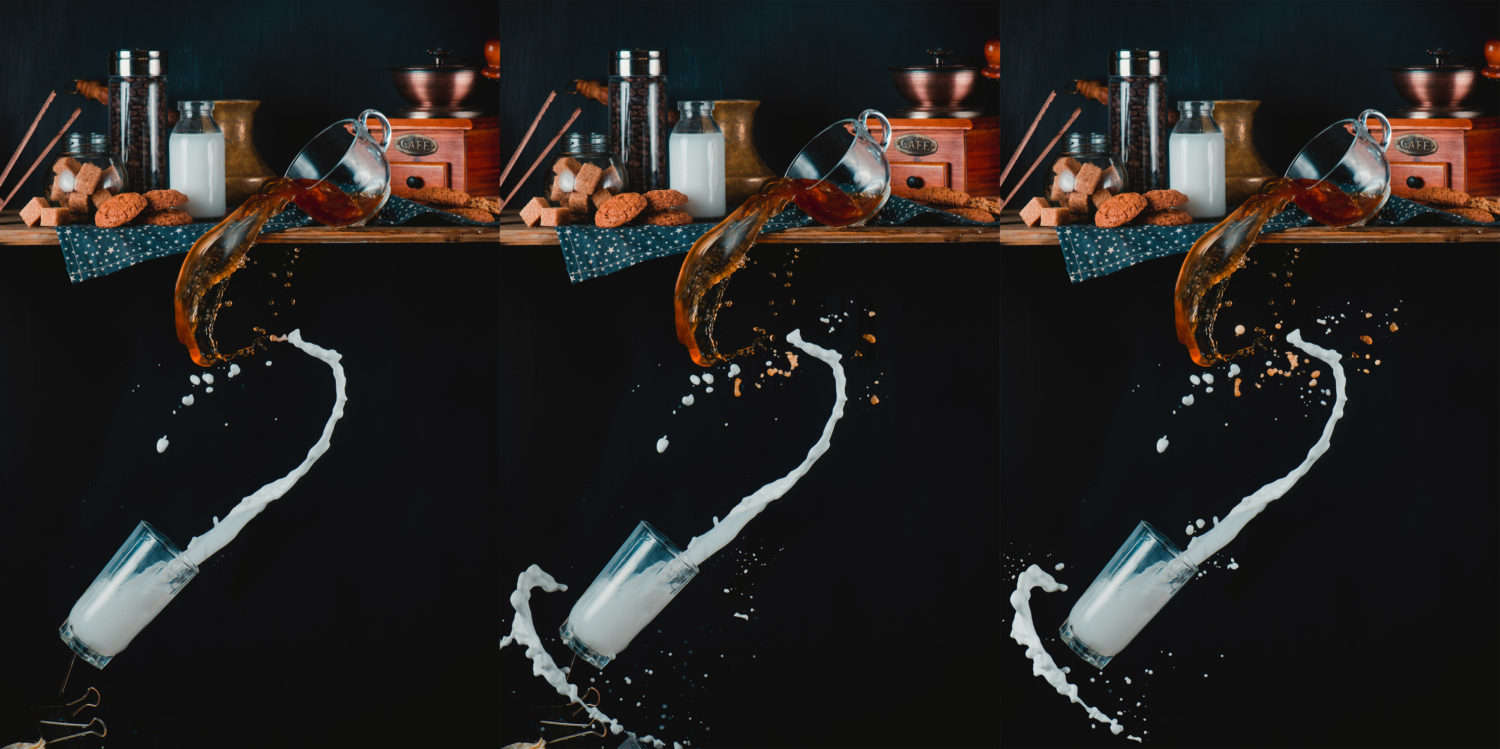
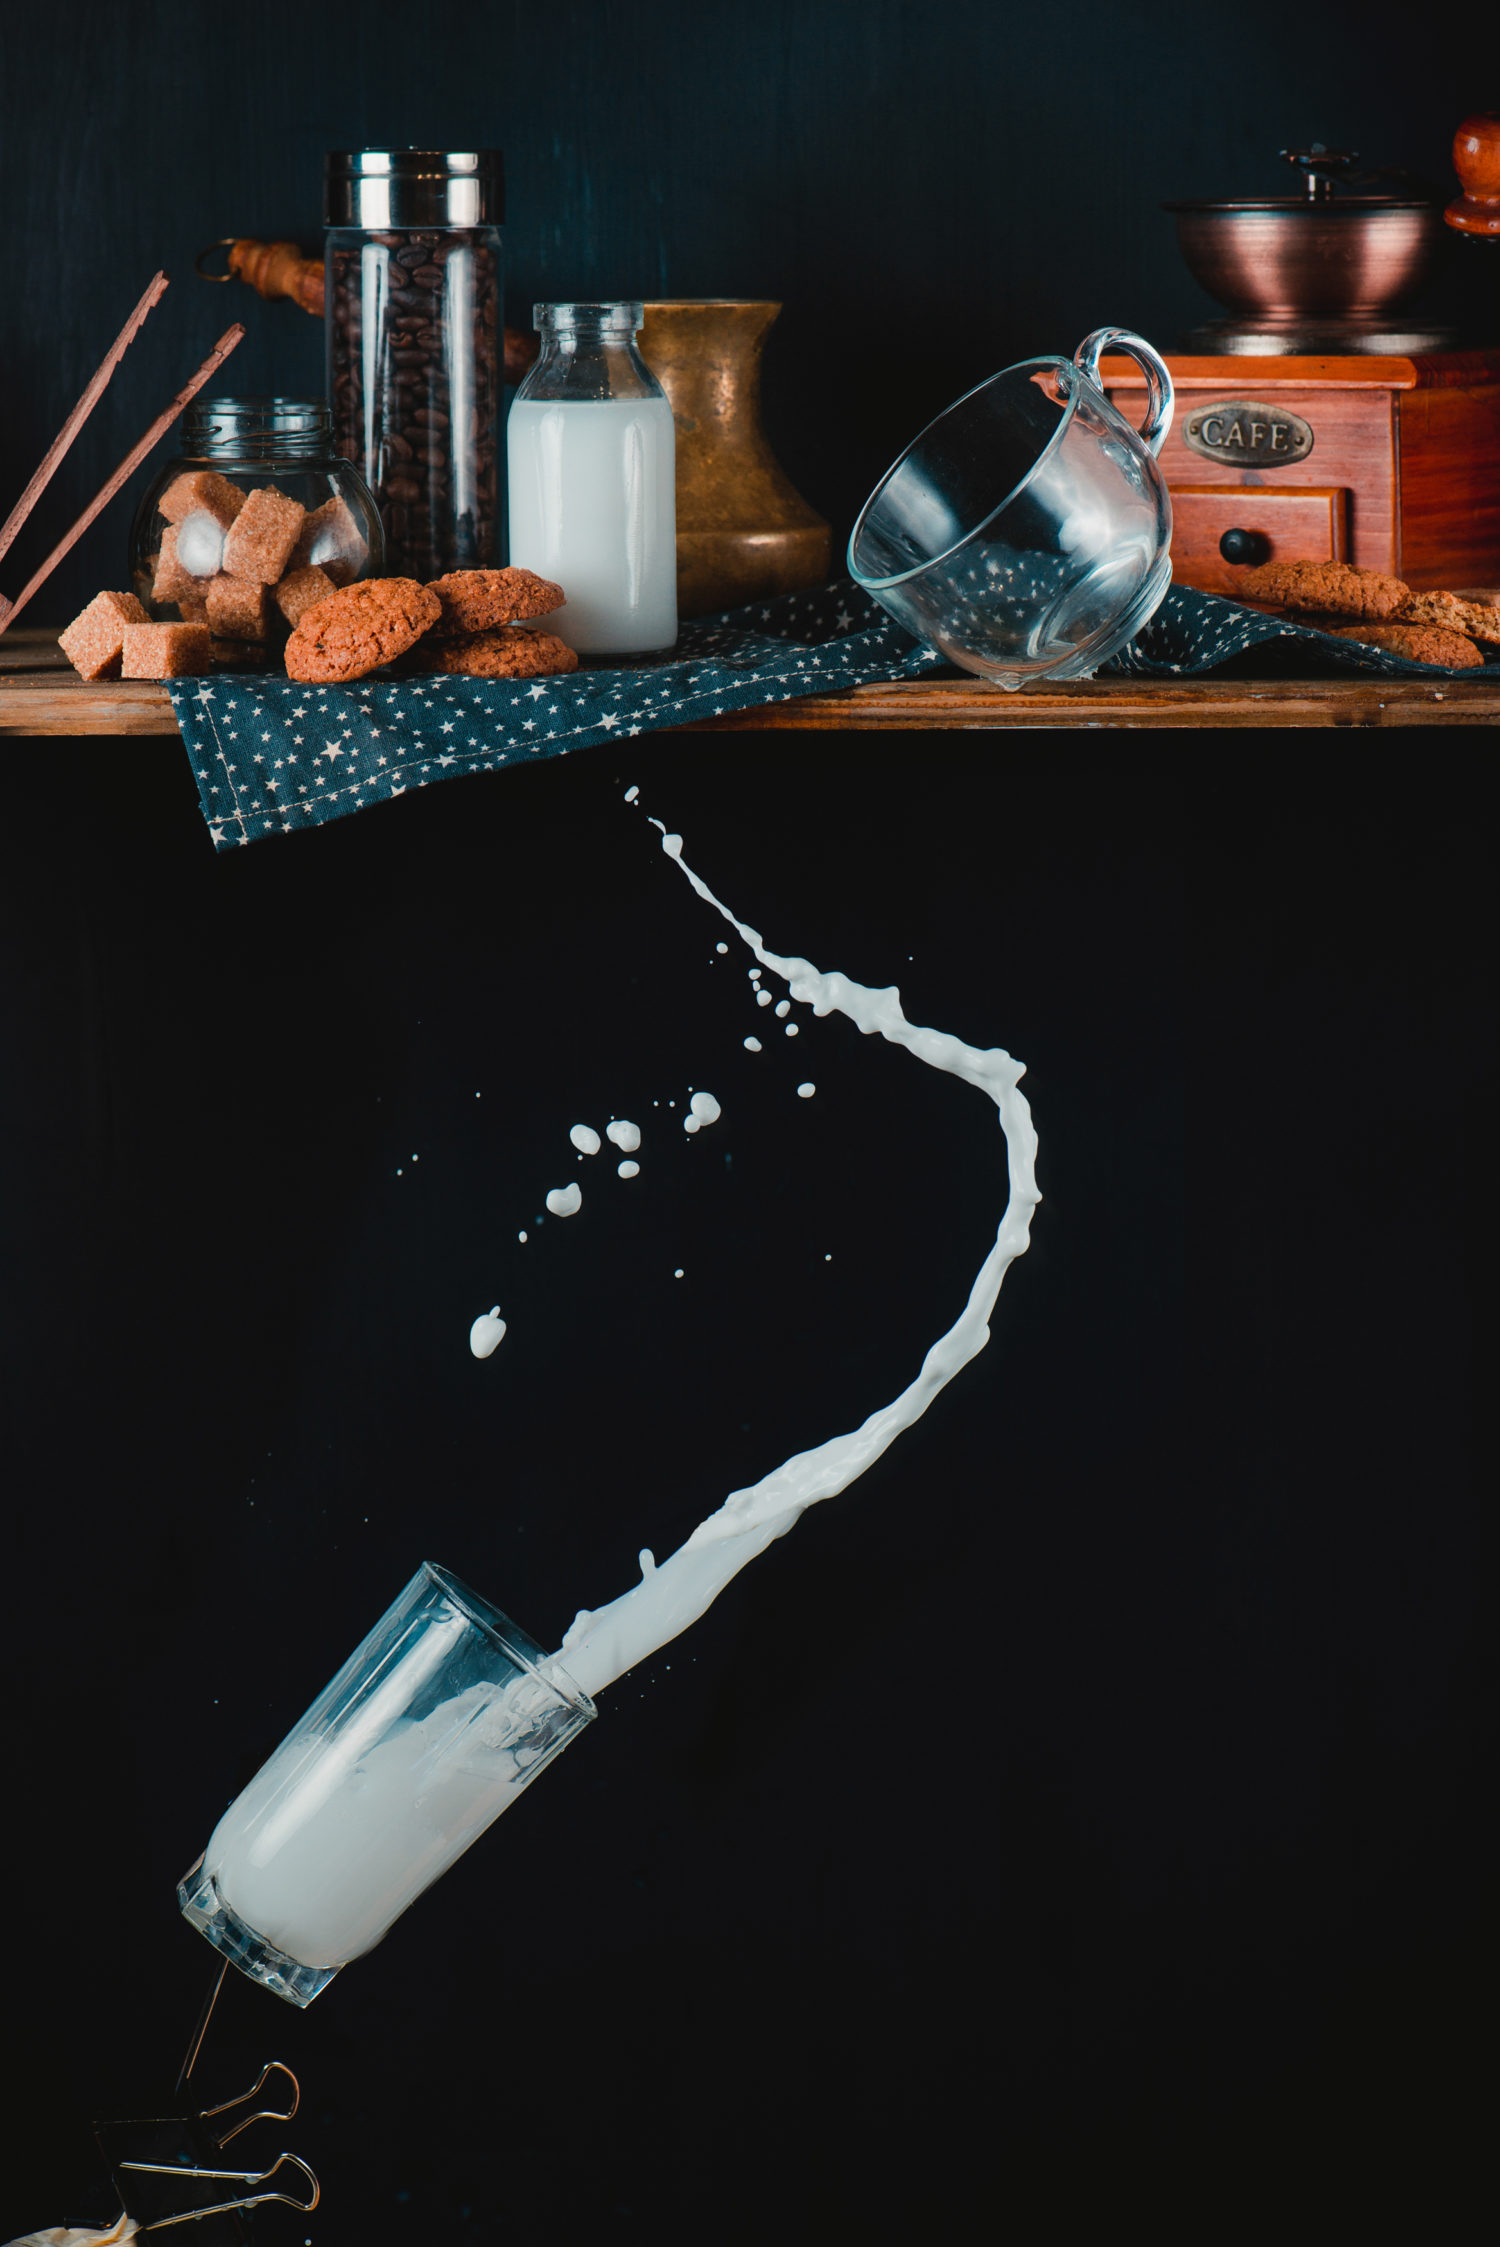
And voila—your image has come to life! This is the final dynamic image:

Now you can try the whole process again with different objects: cookies and flour, donuts and sprinkles, anything you like! Here are some more images from series called, “From the Top Shelf” which were made in exactly the same way.


Now it’s your turn!
Leave a reply