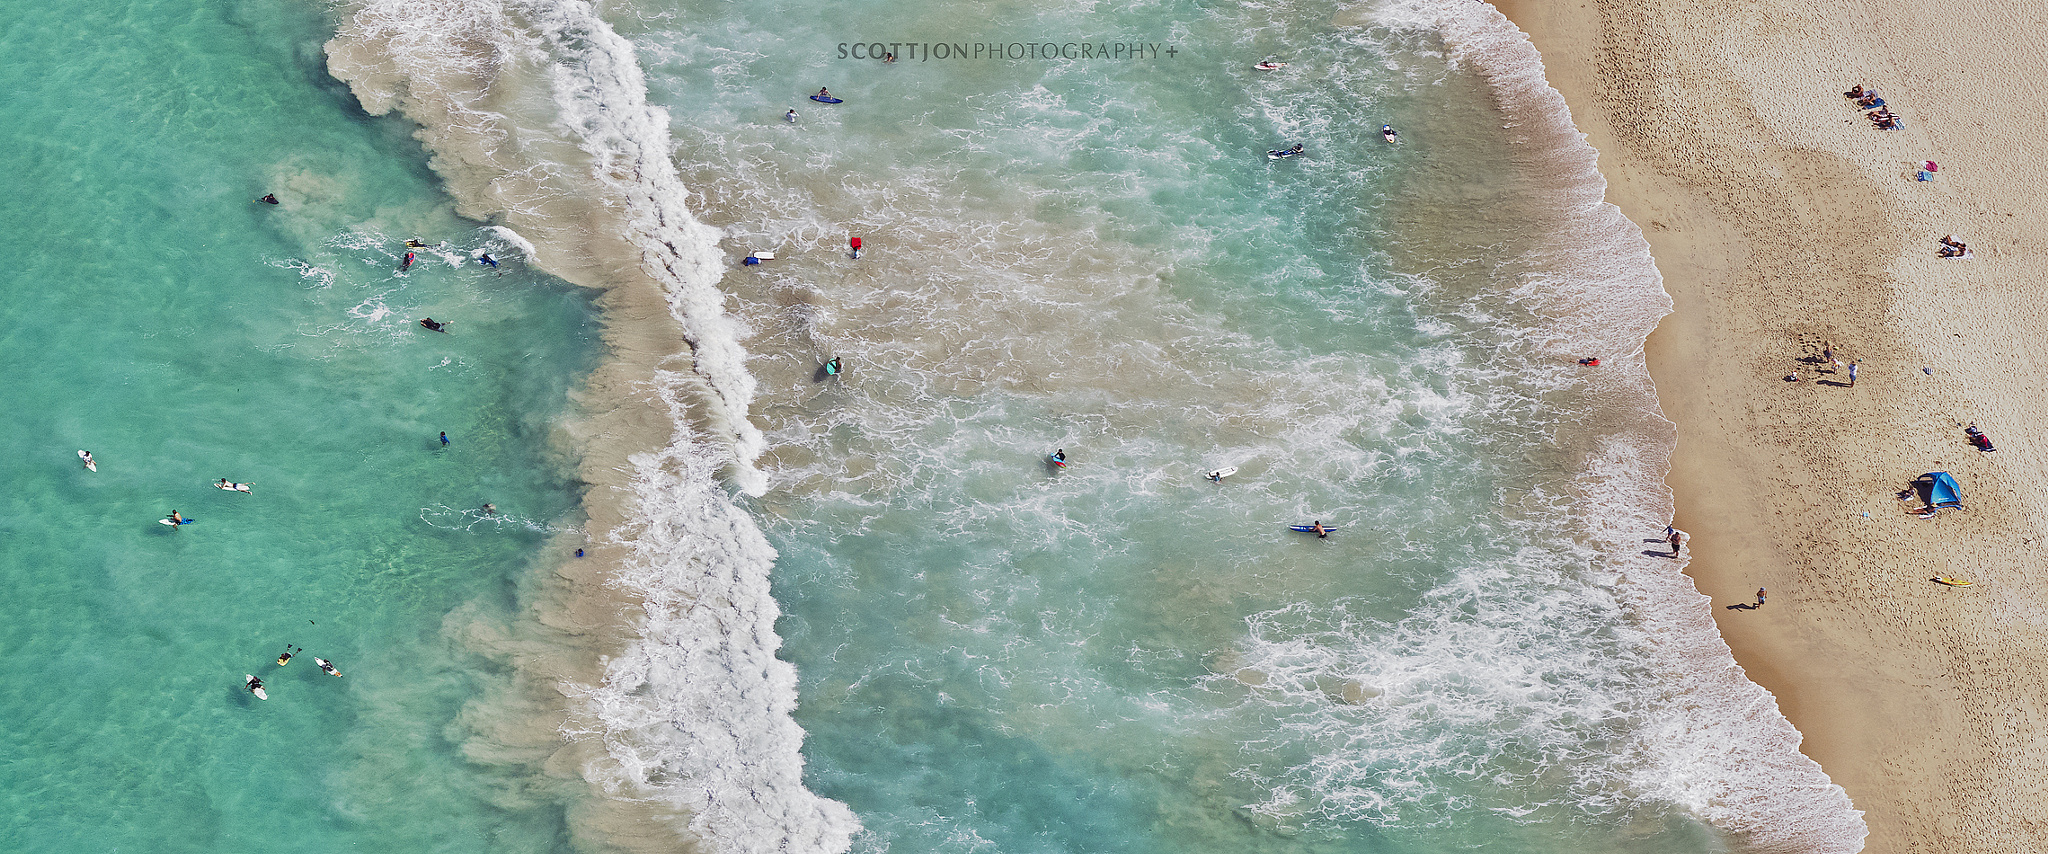
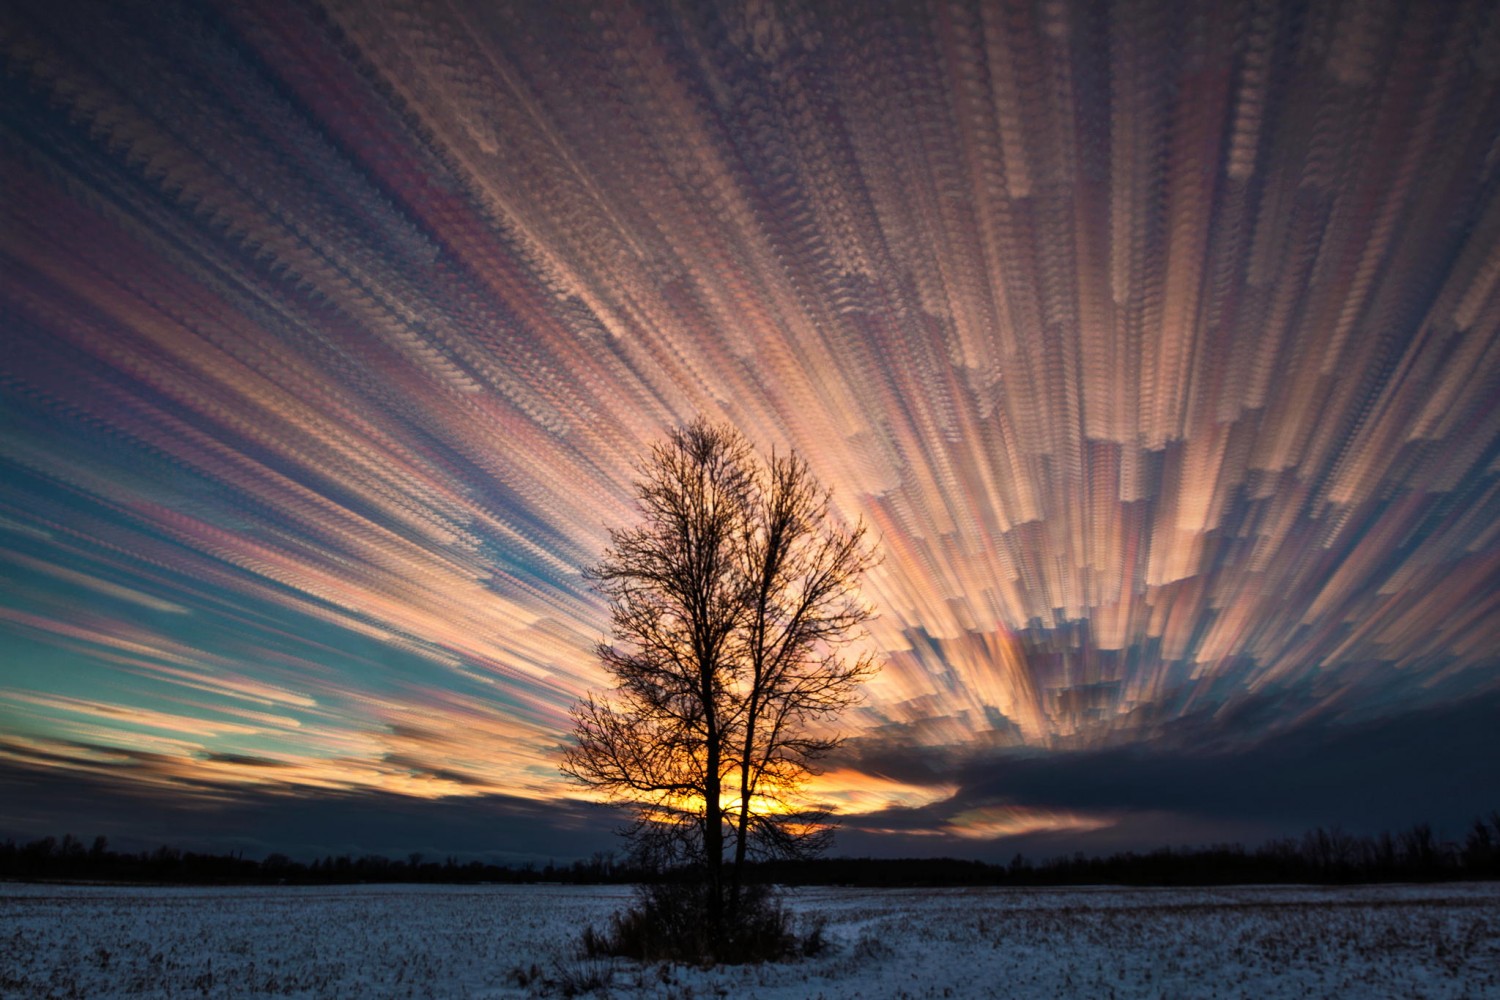
High up on our photography bucket list is to try an aerial photo shoot for the first time. The aerial perspective is mesmerizing to say the least. Whether it’s a traditional aerial landscape like this one, or stunning abstract aerials like the ones scattered throughout this post, every aerial photograph we’ve seen makes us want to take to the skies just a little bit more until—someday soon—we’ll bite the financial bullet and just do it.
And when we do, we’ll follow every single piece of advice photographer Scott McCook outlines in the amazing expert walkthrough he wrote for us below!
Scott captured all the aerials included in this article—it’s safe to say he knows what he’s doing. So if you’re planning to go on your first aerial photo shoot anytime soon, read this now and bookmark it for future reference! You won’t regret it. Scroll down for his tips!

How to Have a Great First Aerial Photo Shoot
by Scott McCook
In recent years I have developed a huge passion for aerial photography, the abstract nature of it appeals to me hugely, more than I ever thought it would to be honest.
Photographing the world from high above can be extremely fun and can also be very difficult if you’re just starting out, so I thought I’d put together a few paragraphs on what you should be looking out for when doing your first flight. By no means do I cover everything but it should be enough to ensure you get maximum bang for your buck while in the air.


Scout a Location and Hire a Plane
Firstly, I will use Google Maps to scout a location. Once I’ve found something suitable, I will then make sure I have an airport nearby that has a Cessna 172, 182, or 210 available.
All 3 planes have pro’s and con’s with the 210 being the most desirable having no wing strut and retractable wheels allowing for a full field of view looking down from the window. If you’re lucky some companies will remove a door from the Cessna 172 which makes shooting a lot of fun!


Create a Flight Path
Ok so I’ve found my location on Google Maps and I’ve found a pilot and plane that suit my budget—here in Australia the average price for a Cessna 182 is about $650 AUD per hour—now I want to make up a flight path to target sites specifically. This is important because you are paying a very large sum of money per hour to fly so you want to make sure your flight is as targeted as possible.
I normally screenshot Google Maps and then use Photoshop to overlay markers and information like “circle area in clockwise direction, 3 x laps”; I do this to just give the pilot an idea of not only where I want to go, but how long I may want to spend in certain areas so he can give some sort of estimate on flight time, meaning I know roughly what I’ll be spending.
Once this is all done its fingers crossed we get good weather on the day, cloud isn’t a bad thing for aerial photography, just wind and rain can be a problem. You want to shoot early or late in the day.


Prep Yourself and Your Gear
I normally try to take off about 10-20 mins after sunrise or about 2 hours before sunset. This will give you nice shadows and soft light on the landscape making for, in my opinion, far more interesting images.
You may be tempted to use a polarizing filter if you’re shooting in the middle of the day, but remember, you want maximum shutter speed and sharpness over anything else! So be careful not to sacrifice too much with a polarizer. The worst outcome is heading back to the editing table, blowing the images up to 100%, and realizing they are not sharp—I’ll explain below how to do your best to avoid that.
So I’m about to jump in the plane, it’s 7:30am and I’m ready to go. I’ll do my pre-checks on the camera gear now: check memory cards are good to go (I’ll use around 64-90gb of cards with my Nikon D810 on a 1 hour + shoot) check batteries are good, and then check my Nikon D810 is setup correctly.

Pre-Flight Gear Setup
Focus mode can be set in a few ways and it will come down to your gear and you; one way to guarantee focus will not change is to tape the focus ring down set to infinity. The tape is important because when you’re flying the wind will move the focus ring unless it’s taped—remember, you’ll be doing 200km’s an hour!
I will sometimes ignore the previous method and go to single point focus mode on my D810, AF-S not continuous. It’s primitive and I’ll be hitting the back button focus every time I line a new composition up, but it works for me and my camera. This way, out of about 1000 images I may get 20 out of focus these days.
You may well ask why I don’t just always use infinity taped down? Well, often I’m using different lenses or I’m using a different camera, even moving to the Pentax 645z on occasion, and sometimes I’m not happy with infinity being infinity so I’ll switch to focusing myself. If you’re flying over areas with very little contrast like bright white salt lakes then using the infinity tape method is key because of the lack of contrast for the camera’s auto focus mode to pick up.
Ok next I check the camera is shooting RAW, white balance is locked to daylight, and anything else I may personally want camera setting wise.

Shooting Settings
Finally, I dial in my settings ahead of time. I normally start with 1/2000th of a second, ISO 400, f/5 and then do some test runs on the ground by running up and down the runway shooting at the ground and then checking images.
This is a great little trick to just make sure everything is running perfectly and setup correctly before getting in the air—remember, you’re being charged for just about every minute you’re in the air so it’s so important to have nothing fail or setup incorrectly before taking off.
Aperture priority, shutter priority, auto? Which mode should I use? Well, you probably won’t want to follow me on this one because I shoot in full manual, I just do it now because I’m used to it and it gives me complete freedom, but it’s not the best way if you’re starting out.
I would start with shutter priority mode, locking in the shutter speed at 1/1500-2000 and then setting the ISO limit to whatever you feel your camera can handle and still produce images with acceptable noise. Be sure to keep an eye on what your aperture is doing, if it’s stopping to f/2.8 (or widest) to net you the shutter speed then tweak it—you don’t want to be shooting at your camera’s widest aperture because, more often than not, it will produce softer images.

Gear Selection
I’ll quickly touch on one more thing before I leave you to it…gear selection. Ultimately, it will come down to what you have in your bag, but there are some best-practices.
Lens-wise, a 50mm-100mm prime lens will be the most desirable but not always available and the focal length will depend on the plane you’re in or the camera you’re using. The Cessna 172 and 182 will have a wing strut and also the landing wheels in your field of view as you look down, this normally means you need to be at about 50mm+ on a full frame to be able to eliminate them from the frame.
Also, if you’re using a zoom lens like my Nikon 24-70mm, it still works wonderfully but you’ll have the added duty of holding the zoom ring all the time unless you tape it because it will move with the wind.
Megapixels also play a big part in aerial photography. Having the power to crop in heavily and still produce images with plenty of detail is incredibly handy—it means you can cover a wider area when shooting and then crop into the image later, allowing you to capture more data and giving more flexibility in post.
If you’re shooting on a camera with, say, 20 megapixels you’ll want to make sure you’re using a lens that is 50mm+ at least. You really want to make sure you don’t need to crop into the image much with a camera like this so just be sure to keep that in mind as you’re shooting and you’ll still have beautiful images that you can print big.
Every camera and lens combo is different and the best advice I can give you is set it up with these general guide lines above and then test it. You may look like you’ve lost your marbles running up and down the tarmac shooting at the ground but it will quickly highlight any errors in your settings and you can jump on that plane knowing the camera is now ready to go.

Final Note
Lastly guys, just remember the plane will be traveling fast! 160-200km’s an hour and you will have lots of wind buffeting you. At first it may be a little disorientating, but you’ll quickly adjust.
Make sure you have nothing in the cabin that isn’t fixed down or fixed to you and, before taking off, make sure you have told the pilot exactly what you’ll require in the cabin and that he is happy with that. At the end of the day, what the pilots says and what the rules state in your country is what you need to work within—safety is the key.
Then it’s take off!! At this point you’ll just be smiling and enjoying the stunning landscape below, nothing else will matter!

Wow! What an awesomely comprehensive breakdown of exactly what you’ll need to do to have a great first aerial photo shoot. Thank you to Scott for putting this together for us!

To see more of Scott’s work—aerial and otherwise—give his 500px account a follow or find him on Facebook and Instagram.
And if aerials aren’t your thing, check out the story behind one of our favorite non-aerial photos of his (a lonely little penguin staring out at the sea) at this link.


Leave a reply