Pedro Quintela is a history teacher, talented photographer, and one of the most motivational people on 500px. In his latest tutorial, he talks about his personal passion for backlist photography.
For more about or from Pedro, follow him on 500px, check him out on Facebook and join his Photo Reflections FB group, or license his images on the 500px Marketplace.
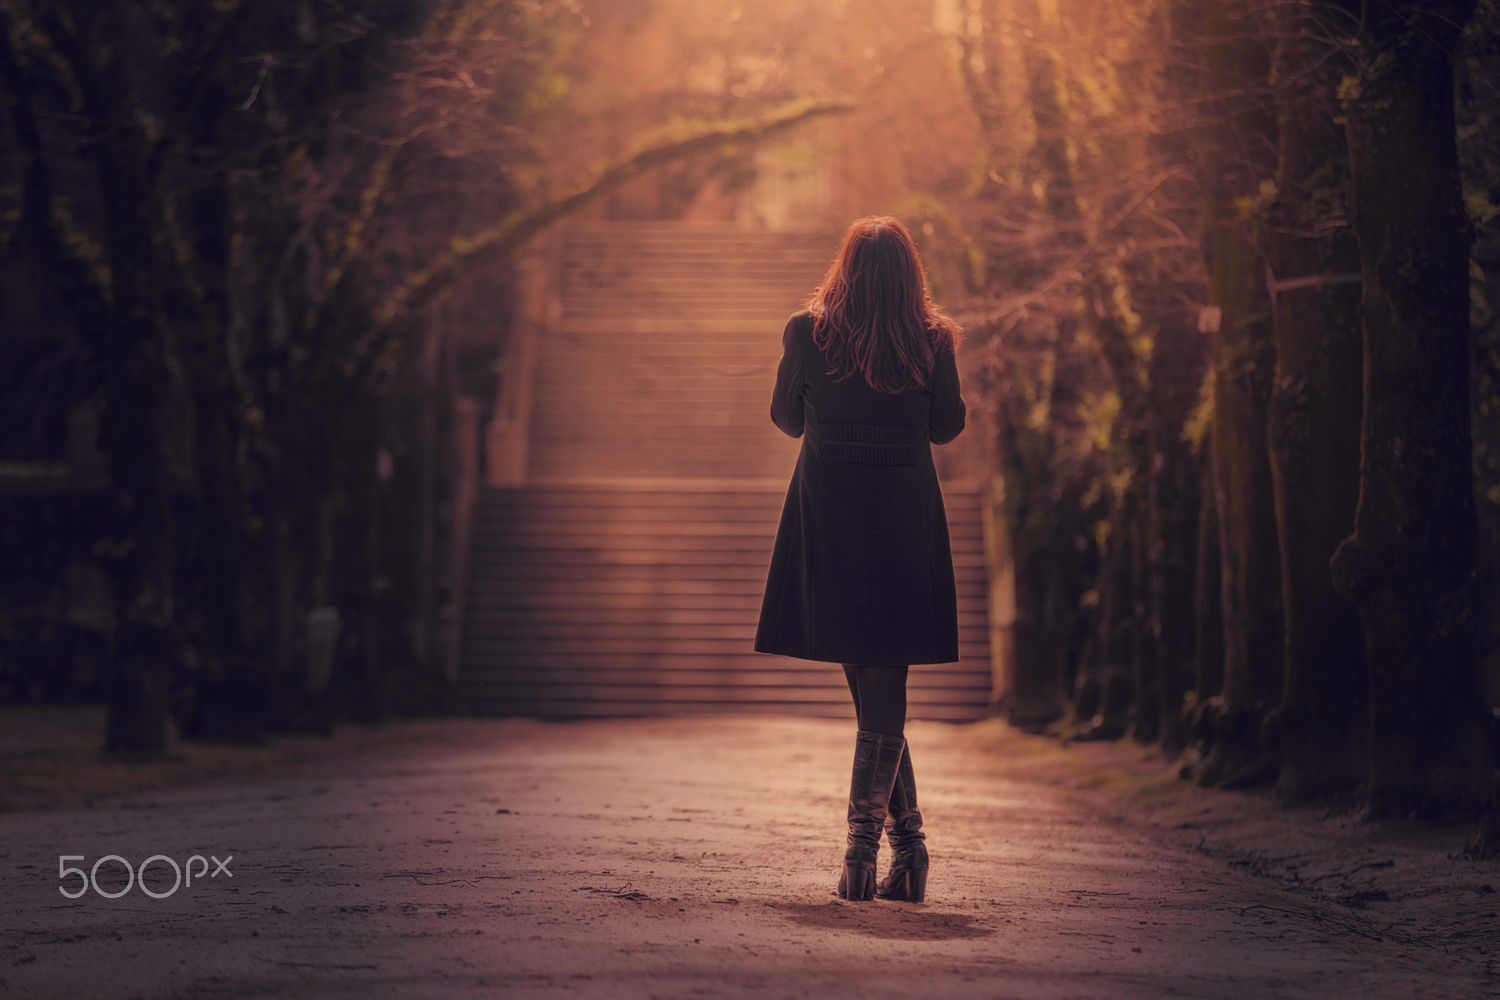
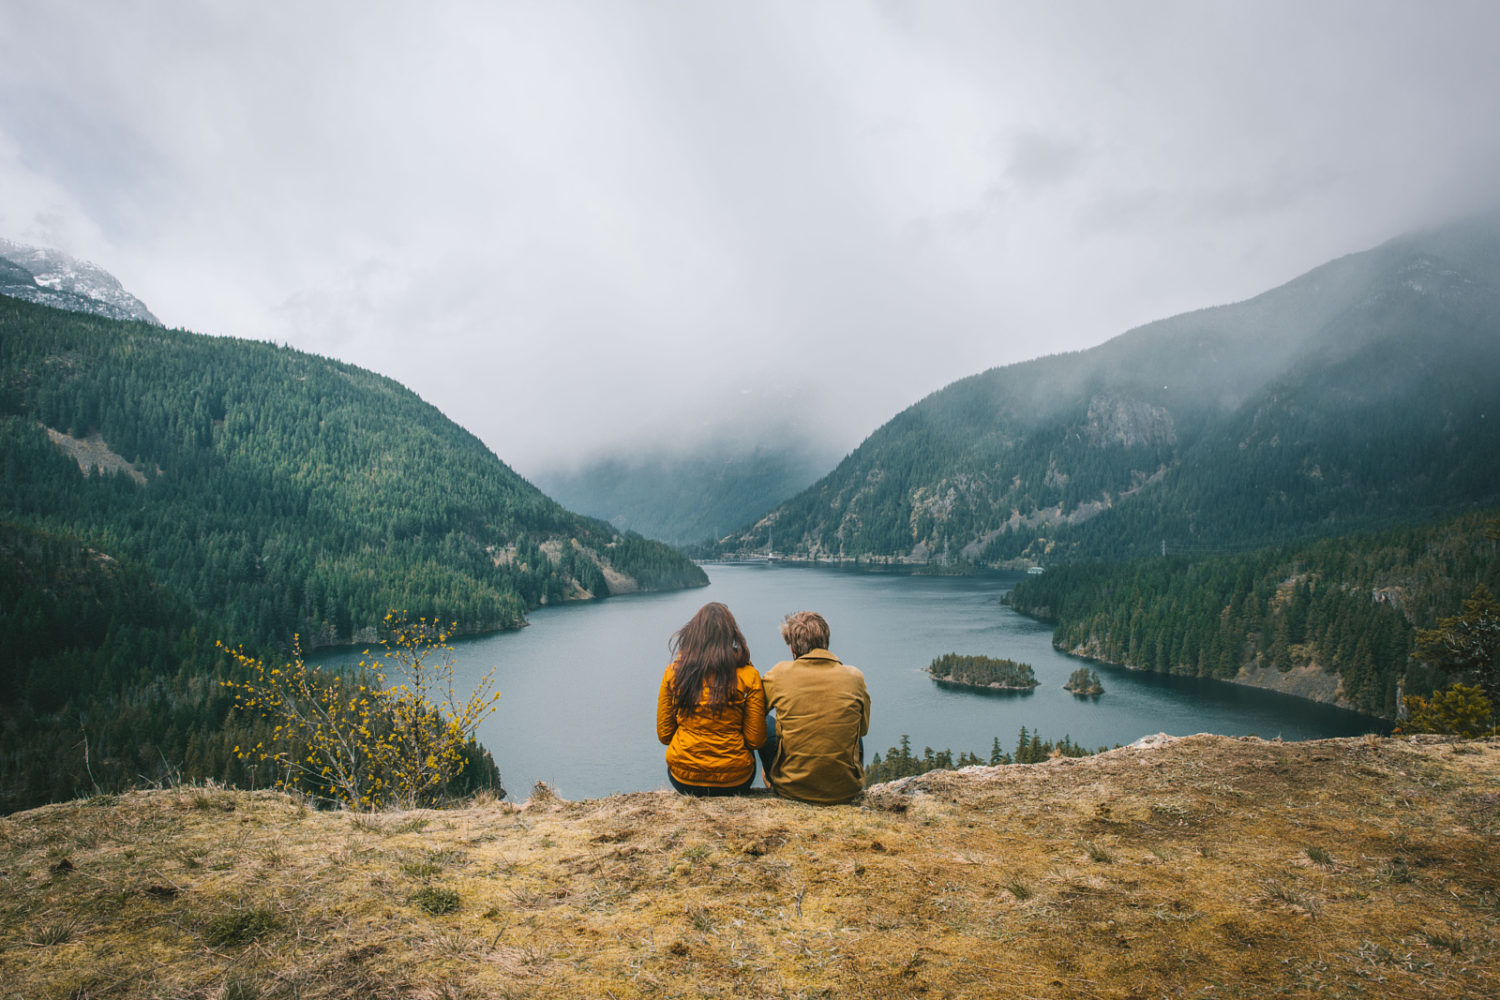
Among all my most treasured techniques, the backlit photo is the one that makes me and my models feel special. What is backlighting? Backlighting is when our model or subject is placed between the light and the camera. Generally, it’s used to add depth to an image, creating drama and a mood that is usually difficult to put into words.
Personally, I do it because I love communicating and creating images that tell a story. I want to always connect deeply with my viewers and audience. Plus, it’s a way to use one of my most important photo tips: Keeping the scene simple. It’s not the easiest technique to master, regardless of how spectacular the moment is. But over the years, I have discovered some rules and tips that can help you in achieving this. With enough patience and practice, you’ll master it too.

Why I Started Doing Backlit Photography
I always see amazing examples of these kind of moments—great portraits of people with a big light source over their figures. This effect is like a magnet to my eyes. But during my first attempt, the result wasn’t flattering at all to the subject. One of those basic things I learned is to never shoot directly under the light source; in this case, the sun.

Yet I really wanted to make the story pop in my images. I want to create a meaningful, special glow that only some sort of “special” light could bring. This means that, by having the sun in the background of our subject, a rim light will have to outline the edges of the model, giving that particular and unique look. Also, this can add a three-dimensional atmosphere leading the viewer’s eye to the subject. This creates the story and can easily grab the viewer’s attention.
How To Shoot Backlit Photos
The first thing to think about is the part of the day you’re shooting. My advice is to use the period of the day that is shortly after sunrise or before sunset. During that time, the available light is at a lower angle. This light is warmer and softer. This allows you to capture a perfect mood as the light can wrap your model or subject with the glow you want.

Next, take care of your camera settings. My most used settings for this are:
. Manual mode, since it gives the full potential of your sensor by using it to create your vision.
. RAW for better control in post-processing. The dynamic range allows you to manage the highlights, and adjust exposure and white balance as needed.
. Spot Metering directed to your subject. This makes the reading the most accurate as possible, excluding the area with the backlight source. It also helps you get greater skin tones.
. Use the exposure dial for a better creational effect. You need to know that by overexposing a little (2/3 of a stop to start), it will darken the subject, giving your subject more detail. By underexposing, a silhouette will be created, which works great in many cases.
. A hood is there to prevent those annoying flares. This depends on the sun’s position, and the coating of your lens. You could also just opt for a flare. Nowadays, it has become a more popular trend in cinematography.
. In some situations, use the focus and recompose technique. For this, you need to set the exposure you want, then lock it, and recompose the scene with the usual halfway shutter.
. Combine wider apertures (from F/1.8 to F/5.6) with fast shutter speeds to get a significantly overexposed image (if you don’t want to create silhouettes) and a very sharp figure.
. Keep ISO values at the minimum possible (100 or 200 according to the camera specifications).
. I usually try to use fast glass and focal lengths that give a certain compression and bokeh. On my full frame bodies, I prefer the 50mm, 85mm, and 200mm. The aperture varies between F/ 1.4 and F/4. On an APS-C sized sensor (“crop sensor”). Don’t forget to use the magnification values to get the effective focal length (x 1.6 for Canon, x 1.5 for Nikon, for example).

Which Situations Work Best With Backlit Photography?
In my experience, having a simple background, and strong sunlight at a lower angle will be great for you. Avoid complex backgrounds with elevations behind you that will block the sun easier then the sunset angle in a lower location. I prefer higher places facing the sun, without any structures or foliage around. Generally, it’s possible to create that delicious bokeh, with a subtle amount of haze and crimson hues.

Always choose the low angle sun, because this allows you to reduce the amount of contrast that’s between your subject and the background. Your subject should be placed in the composition as told, blocking a vast area of the sun to prevent excess of light floating into your scene. I know isn’t easy, but the key here is to get that spot where you get that balance between a clean figure and a golden glow.
Avoid to let the sun directly into your lens. It will make your AF point go crazy, trying to get proper conditions to achieve focus. It will also give too much haze. The key here is to balance the amount of light and shadow.
As always—try, try, and try. Only with experience will you be able to achieve your own vision and particular look. Nothing comes cheap or easy, so be prepared for not-so great images during your first attempt. Don’t forget to have a great time while doing it. Personally, if I’m not having fun, something is wrong.

Happy shooting to all of you!
Leave a reply