
Color balance underwater is not always an easy task. In a fresh water spring, you have the ability to capture the red spectrum a bit more than in a pool, but still not nearly as much as on land. The approach to color correcting your underwater images is not as daunting as it may seem the moment you open them up on your computer and see just blue hues. A few tips will bring back what you envisioned the moment you submerged your camera.
The biggest gasp I hear when teaching workshops underwater is how the photographers do not realize just how much of the red spectrum is lost barely one meter underwater. Some underwater photographers use red filters, but mainly on wildlife or fish photography as they are shooting up close with a smaller subject. Adding in a filter, while can be great, also adds another barrier between you and your subject if you are shooting portraits. The lesser the distance, turbidity, filters, and adapters will bring more clarity to your image. I personally opt for the clarity knowing the color issues can be taken care of in a few small steps.
Starting Out
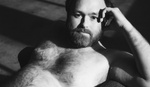
The typical pool shot image straight out of camera usually looks like the image below. The first image always gets a very rough and quick slider take in Lightroom just to see how the end result may turn out. Lightroom can be a great way to edit batch images, however with underwater work it is preferred to use Photoshop or another detailed editing program so it is not applied to the image as a whole but more locally.

Nikon D810 with Ikelite housing. DS51 strobe triggering one strobe camera left on land with 15 foot sync cord. 1/200 at F8, ISO 200

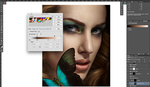
Lighroom sliders to get an over all idea of what the final image colors could result in.
Details Not to be Missed
Smaller issues such as wardrobe tags, air bubbles near the eyes, and applying makeup are too important to look over. While they may seem small and insignificant in digital form, if your client chooses to print a large wall art piece it will become a major concern. The spot healing brush is a quick and easy fix to smaller areas.

Hiring an underwater makeup artist who is experienced underwater sessions can save a lot of time in post production. For this tutorial I opted to have my model come in without anything that a normal client would apply to show how if in a pinch you can rework it. Red lipstick is a major yes for me in underwater photography as it is the one color I can pull from to apply the same hue to the checks and eyelids. A bright matte lipstick works best for underwater. Allow it to be applied about 10 minutes before submerging and you should not have any issues after. First use the eye dropper tool to pick up the color of the lips, then with a soft very low opacity brush (around 4%) and a low flow (around 30%) apply the blush on the cheekbone and lightly on the upper eyelids. Apply a pure black skinny soft brush to the lashes to darken the effect. Lowering the opacity of the entire layer can blend the new look into place.

Cleaning up the backdrop where it floated is easily done with the clone or marque tool.

Color Correction Using Curves
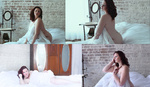
Many factors are involved when color correcting underwater shots. The type of water body the image was shot in, how deep the subject was as well as personal artistic preference for the final image. The blue hues that are sometimes left in underwater art give the image the feeling of being deeper and in an abyss. The more colorful the closer the feeling to the surface. Working with the different sections of the curves layers, specifically the reds and blues, you can then mask out where it was applied heavily compared to the other areas. You can also invert this mask in order to paint the layer where you see fit. In the image below, the increase in the reds was a bit too drastic in the upper chest area so applying the mask will do the trick.
Using curves is a far more detailed way than a slider in Lightroom when utilizing the mask options. While Lightroom is an effective way to see a general visual of how the image will lean towards, it does not have the ability to apply it to specific areas. Even with the brush tool I have personally found a curves layer as a better option as a whole.

Adding Dramatic Style
Flowing hair is a great way to add drama to an underwater image. This models hair was very long but flowed back behind her during her descent. Select the hair and create a new layer from it. Then use the free transform tool along with the warp tool to place it where you prefer. Mask out highlighted pieces in order to blend it into the original hair. Once the hair layer is in place and masked out, use a skinny soft brush to add in a few highlights to that side will help with the texture replacement of the hair. For this image I sampled from the opposite side of her hair that had lighter colors to balance out some of the dark areas.
The same applies to adding more flow to a skirt as a larger skirt can be cumbersome as well as dangerously heavy for a client. Allowing them to swim freely in a shorter more manageable skirt is more preferable.


Artistic Preference
Once makeup, distraction, and color correction have taken place, the end result can be left or altered a bit more depending on your mood. Using stock imagery is a fantastic way to add even more dramatic looks to your underwater world. For this image I kept it very simple and went with a more defined surface line and a lighter gradient in Lightroom.

These are just a few ways to bring back the lost colors in your underwater photography. If you have any helpful tips for other readers leave a comment below.


Okay, well this is super cool!!
This is really informative and an incredibly cool niche concept that I would have never come up with... which is why when I first saw the title I burst out laughing... Makes me wonder how many other amazing concepts have been past over because they sounded wild, but in practice are incredible works of art! Hats off to you JT for even going there, and just WOW for what you have done with it now that you have gone there... We need more innovators like you out there in the broader photographic community!
Follow-up question, would you consider doing an article on the basics of underwater photography? Equipment, exposure challenges, lighting, etc. No need to give away all the secrets, but a beginners guide with things the newbie might not consider... That would be awesome!
I would love to! I'll even try to do a video to show and explain. I am an open book when it comes to underwater education
Seems like if you shot RAW underwater you can add the color back much easier than going all the way through the process to do it pixel mode. I find natural light shots in a pool to be about 9000K and +100 Tint give or take a little.
yes I always shoot raw.. but I prefer the ability to add the color where I see fit ( it allows me to keep the blues in the deep to get that abyss look)
But I have not gone over 5-6 k ( I always shoot cool) This may be a fun experiment to see how I would edit an image at 9! I feel a follow up article now:) thank you!
I've just got into shooting underwater that I've been hesitating for 10 years, I've added some images on my profile. I just got crazy one day and do it, bought Ikelite system <<OUCH>> very price but worth it. I had to upgrade my insurance too. It's been pretty difficult to meet photographers that shoot underwater or join a group of underwater photographers. Thanks for sharing some tricks, I do it similar too. Great job.
You should join the group https://www.facebook.com/groups/JTaquaunderwater/
it has a bunch of uw photographers you can meet along with models that are skilled at uw work!
Jennifer Tallerico, Hi! First, thank you for this informative article and the rest you publish here trying to pass on your knowledge/experience to others. I was drawn to your personal website because one article mentioned your underwater work. Checking out your site, your underwater work is fantastic. I'm very impressed with what your able to do in the water with people off the street, (non professional talent) that want an underwater photo! I say this having spent the last 40 years doing lighting (plenty of it underwater on scuba air) in the Motion Picture/TV/Commercial world. I have full appreciation for what's involved with building sets, getting cabled, powered, costumed and ready to take your talent underwater where what looks easy takes on a whole different dimension, so color me impressed with what you're doing. Please don't think I'm one of the people you see in these forums that diss other Photographers about the rates they charge That isn't where these questions come from. I'm stunned your underwater work is priced the same as a no makeup boudoir session! I would think you needed more people involved rather than less. You're in the perfect part of the world to be doing this type of work. Your business is yours and I'm sure you've got people lining up for shots like these. That Green/Gray toned one of the woman in what looks like Cinderella's Wedding Dress is stunning. :) Here's what I'm asking: Is the work on your site representative of the $300 fee? Two 8x10's, the costumes, sets/locations, editing = $300!?!? If not, would you be comfortable giving me an idea of what an average fee is to capture some of these is? Some of those costumes are fantastic! And those Mermaid Tails!! I might plan a trip to Florida just to see what you can do with this 62 year old geezer. Best wishes, and by all means keep doing what you're doing. :)
Thank you so much for your kind words! The 300 is the session fee only. I have priced my albums and wall art higher as I am selling the art rather than the material (although I do try to keep up with the highest quality materials). The 300 is merely for the time in the pool. My collections range from 1100-2900 for albums and wall art. And if you are ever in the area and want to book a shoot please let me know!
Hi and thanks for your explanations. I don't practise boudoir photography but in general underwater processing I very often use the CameraRaw HSL sliders to regain saturation and brightness in the warm tones and more depth and purity for the blues. In Ps you even can benefit of the local masking possibilities. Hoping it helps